Introduction
As part of the Free AWS Cloud Project Bootcamp, we were instructed to use Gitpod for our Cloud Development Environment (CDE), as our primary instruction would be carried out within it. Github Codespaces was recommended as an alternative CDE, in case we ran out of free credits on Gitpod.
The main reason for using a CDE rather than our own computers, was to try and maintain consistency between environments to make troubleshooting as simple as possible. It just wasn’t possible for the instructors to support so much different hardware and operating systems, as some students would be using different configurations on Windows, Mac, and even Linux.
The Problem
As we were in the fourth week of the bootcamp (Week 3), some students were already running out of credits for both platforms, and were spending additional time modifying environment variables and configuration files to get the environment to work properly, while migrating between platforms. A number of students even started spinning up new accounts or repositories on the platforms to try and reuse the free tier.
The other alternative was paying for additional Gitpod credits, which wasn’t always feasible. Also, the monthly paid plan only provided 1000 credits per month (and eliminated the free tier). If you exceeded 1000 credits, you would be billed “pay-as-you-go” per credit after that:

The Solution
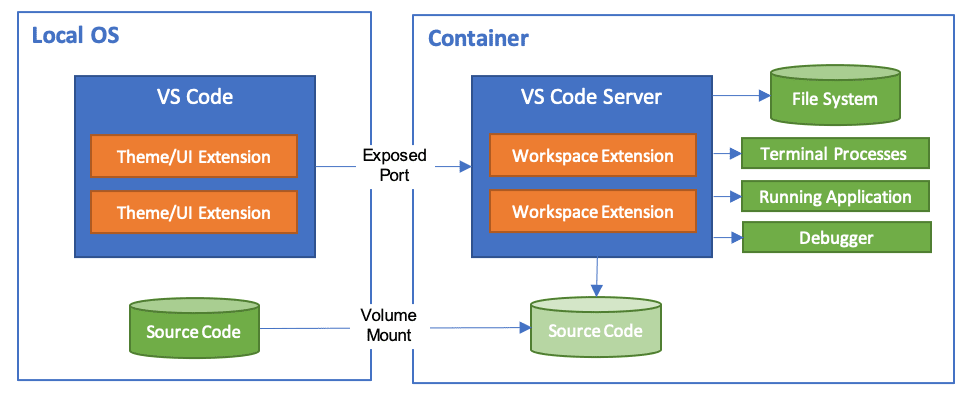
Dev Containers. The underlying technology behind Gitpod, Github CodeSpaces, and other Cloud Development Environments is actually Docker containers. The workspaces we are using to develop in, are actually running inside Docker containers. Many of the CDEs like Github Codespaces are based on the Development Containers Specification. Visual Studio Code already supports developing inside a container, the same way you can use a local VS Code installation to connect to your Gitpod or Github Codespaces workspace:
If we can design a configuration or container image that has everything we need in terms of software prerequisites, we can all use this same configuration and work inside a container. We can even define all of the configuration as code and store it in our repository.
The Code
I’ve added the code that we can use for setting up the Dev Container in this Github Repository, and I will do my best to use it and maintain it as we go along in the bootcamp. This code can be added to your own aws-bootcamp-cruddur-2023 repository and then used to launch your Visual Studio Code development environment, using the dev container.
The code is contained within a .devcontainer folder in your repository, and consists of two files:
- devcontainer.json – Contains all of the configuration information that Visual Studio Code uses to launch the Dev Container.
- Dockerfile – A standard Dockerfile template that instructs on how to build the image used to launch the Dev Container. I’ve taken the initiative to build something that I believe will work for us, but it can be modified as needed.
To use this setup, you’ll need to copy the folder and both files to the root of your repository.
Prerequisites

To use this solution, locally on your computer you will need the following:
- Docker Desktop 2.0+ for Windows/Mac, or Docker CE and Docker Compose on Linux.
- Visual Studio Code
- Some Visual Studio Code extensions – primarily the Dev Containers (ms-vscode-remote.remote-containers) extension for running the environment.
- Your cloned Github repository aws-bootcamp-cruddur-2023.
- Environment variables set on the host OS with your secure values to pass into the container.
- Some minor modifications to the project code to get Cruddur URLs to work, the same as if you were going to use Github Codespaces instead of Gitpod.
From a hardware perspective, 1GB of RAM is required, but at least 2GB RAM and a 2-core CPU is recommended. The more memory and processing power you can allocate to this, the faster things will build and run.
Proof of Concept – Software Installation
To test this all out, I installed a brand new Windows 11 Pro installation on an old laptop. I installed Google Chrome, Visual Studio Code, Windows Subsystem For Linux, Git for Windows (with all the default settings), and Docker Desktop. I went through all of the steps to set up everything from this point on.
Set up Environment Variables
To ensure VS Code, and our Dev Container can read our secure environment variables without having to store them in code or a secrets manager, on the Windows 11 machine, I added the following environment variables to the system that we were also using in Gitpod and Github Codespaces by running the following commands in a PowerShell command line:
[Environment]::SetEnvironmentVariable("AWS_ACCESS_KEY_ID", "<Value>", "Machine")
[Environment]::SetEnvironmentVariable("AWS_ACCOUNT_ID", "<Value>", "Machine")
[Environment]::SetEnvironmentVariable("AWS_DEFAULT_REGION", "<Value>", "Machine")
[Environment]::SetEnvironmentVariable("AWS_SECRET_ACCESS_KEY", "<Value>", "Machine")
[Environment]::SetEnvironmentVariable("DOCKER_USERNAME", "<Value>", "Machine")
[Environment]::SetEnvironmentVariable("DOCKER_PASSWORD", "<Value>", "Machine")
[Environment]::SetEnvironmentVariable("HONEYCOMB_API_KEY", "<Value>", "Machine")
[Environment]::SetEnvironmentVariable("ROLLBAR_ACCESS_TOKEN", "<Value>", "Machine")
Once I added the environment variables, I restarted PowerShell, and ran dir Env: to confirm the values were present. I was also able to see the environment variables in the System Properties > Advanced > Environment Variables > System Variables section.
Pull Code From Github
I created a Documents > Github folder to store my code. I opened VS Code and opened the Home folder. I opened a terminal and went to the folder I created at C:\Users\jason\Documents\Github.
I went to Github, went to my repo, then went to Code > Clone > HTTPS, and copied the URL.
In the VS Code Terminal I entered:
git clone https://github.com/linuxtek-canada/aws-bootcamp-cruddur-2023.gitThis cloned the repository code to C:\Users\jason\Documents\Github\aws-bootcamp-cruddur-2023.
In my case, I had to switch to my Week 3 branch using git checkout week-3, but if you are only using the main branch, you shouldn’t need to do this.
Store Git Credentials
I ran the following in a terminal to set my Git credentials to be stored, and then verified them:
git config --global credential.helper manager
git config -–global user.email “<[email protected]>”
git config -–global user.name “<Your Name>”
git config -–global -–list
Install Dev Containers Extension
In VS Code, I went to Extensions and searched for Dev Containers, and installed the extension:

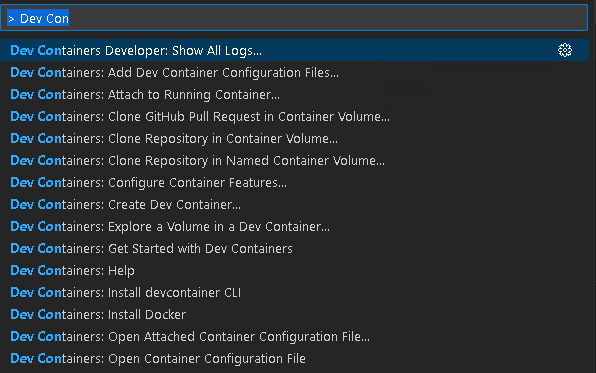
Once installed, if you go to the top terminal window, you can type in > Dev Containers (including the chevron) to see the available commands:
Build the Dev Container
I opened and signed into Docker Desktop, just to make sure the Docker services were running.
In VS Code, I went to the top middle terminal and typed >Devcontainers: Install Devcontainer CLI. I got this message once it was successfully installed:
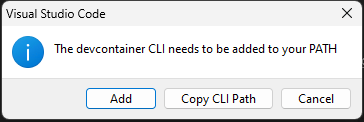
I clicked Add, then OK. I then restarted VS Code to pick up the new path.
I then ran the following in the terminal while in the aws-bootcamp-cruddur-2023 folder:
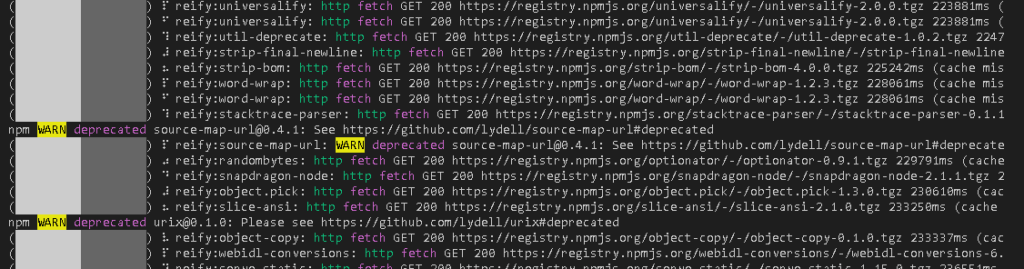
devcontainer buildThis took quite a while, as there are a lot of steps for building the Docker container image, but as long as text like this is scrolling, it is still building properly.
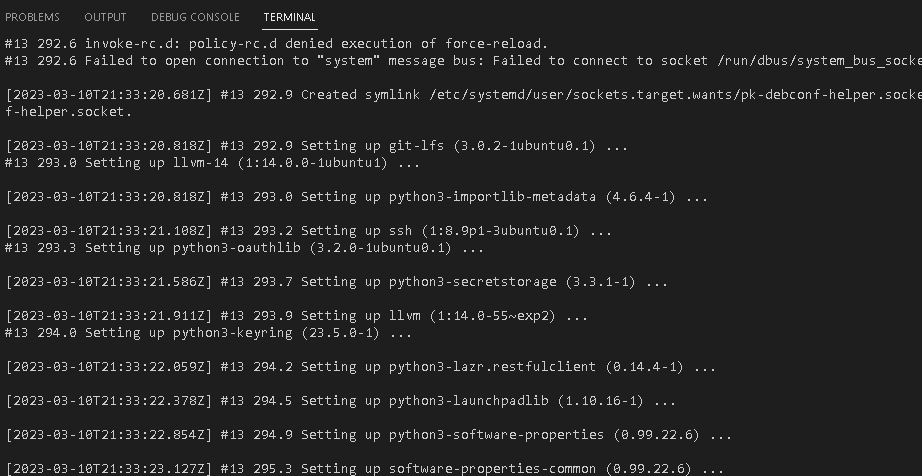
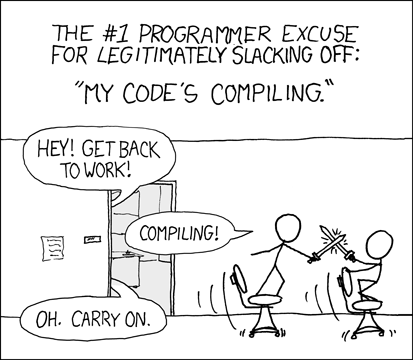
This would be a good time to grab a coffee ☕, or take a break:
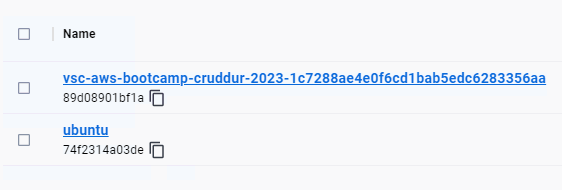
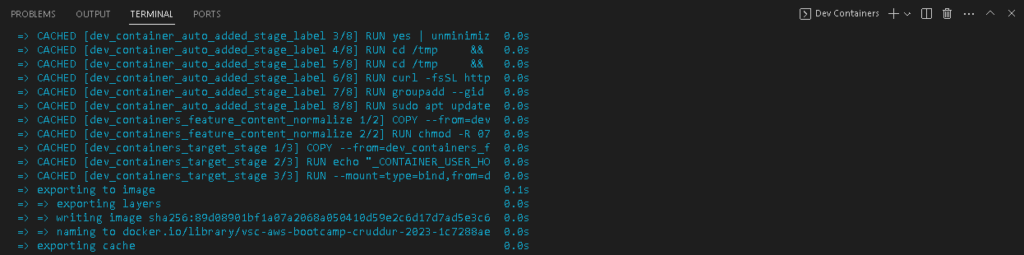
Once this finished, you should end with a line similar to this:
{"outcome":"success","imageName":["vsc-aws-bootcamp-cruddur-2023-1c7288ae4e0f6cd1bab5edc6283356aa"]}You should also see this image available in Docker Desktop under Images:
Launch the Dev Container
Now that the Dev Container is built, I launched it by running the following while in the aws-bootcamp-cruddur-2023 directory:
devcontainer openThis should spawn a NEW VS Code window, start loading the Dev Container, and running the commands stored in the devcontainer.json file.
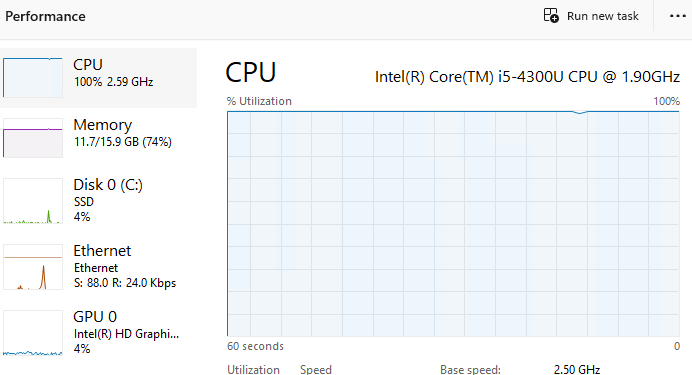
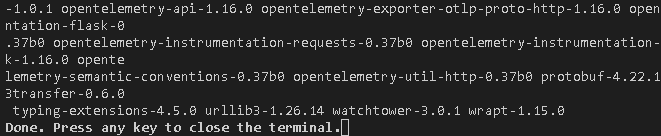
After a few seconds it will also install the set VS Code extensions, run an npm install on the frontend-react-js directory, and a pip install -r requirements.txt on the backend-flask directory. You can click the “Show Log” option in the bottom right if you want to see what it’s doing.
Again, it may take a while to download and install all of the requirements the first time, especially depending on your computer hardware. In my case it used 100% CPU and about 12GB of RAM on my old laptop:
It may also load some popups as the extensions install (I haven’t found a way to turn this off yet).
If you look in the bottom bar, you’ll see that you are connected to the Dev Container, and if the configuration is still processing:

To differentiate between VS Code environments, the top title bar has been labelled:
aws-bootcamp-cruddur-2023 Dev Container: Free AWS Cloud Bootcamp Development Environment

Once the postAttachCommand section has finished, you should see the following:
Using the Dev Environment
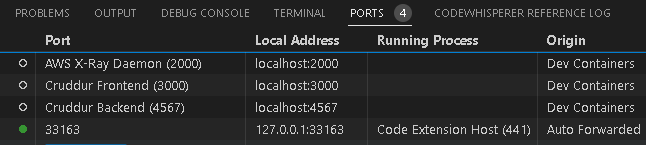
This should be a very similar experience to using Gitpod. The Ports tab is available, and the devcontainer.json file sets Port 3000, 4567, and 2000 to be open by default, and even named nicely for convenience:
Reconfiguring Cruddur
There were a few minor changes that we need to make in order for the Cruddur application to work with the local ports, rather than the preconfigured URLs we were using for Gitpod or Github Codespaces.
In the docker-compose.yml you’ll need to adjust the following lines. In my case, I commented out the old values in case we ever needed to revert to using Gitpod.
# FRONTEND_URL: "https://3000-${GITPOD_WORKSPACE_ID}.${GITPOD_WORKSPACE_CLUSTER_HOST}"
FRONTEND_URL: "http://localhost:3000"

# BACKEND_URL: "https://4567-${GITPOD_WORKSPACE_ID}.${GITPOD_WORKSPACE_CLUSTER_HOST}"
BACKEND_URL: "http://localhost:4567"

# AWS_XRAY_URL: "*4567-${GITPOD_WORKSPACE_ID}.${GITPOD_WORKSPACE_CLUSTER_HOST}*"
AWS_XRAY_URL: "*localhost:4567*"

# REACT_APP_BACKEND_URL: "https://4567-${GITPOD_WORKSPACE_ID}.${GITPOD_WORKSPACE_CLUSTER_HOST}"
REACT_APP_BACKEND_URL: "http://localhost:4567"
Note that the URLs were changed from HTTPS to HTTP as we didn’t actually have SSL implemented. The HTTPS was being front-ended by Gitpod to allow access to the “local” port over the internet.
Once this was saved, bringing up the environment should be as simple as on Gitpod. Just open a new terminal window, and run:
docker compose upAnd wait while everything loads up.
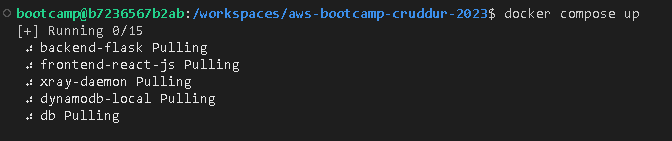
Because the container will have to pull all of the image layers and run the install, this again may take a while.
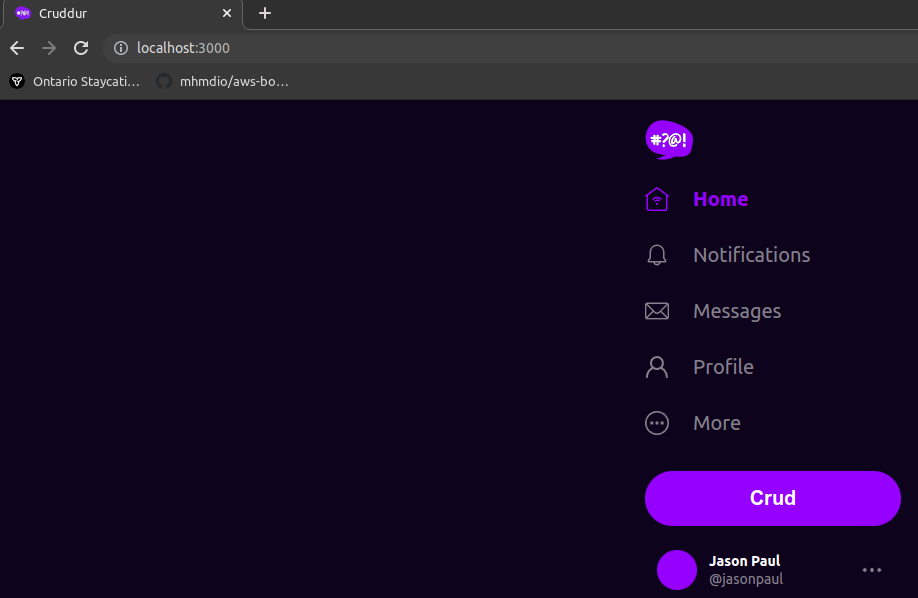
Once the ports go green for the Frontend and Backend and you get a popup, you should be able to access them using http://localhost:3000 or http://localhost:4567 respectively. You can even go to Ports, right click on the port, and open in browser.
Under The Hood – Dockerfile
The Dockerfile created a custom image for the Dev Container, based on Ubuntu 22.04 Jammy Jellyfish. It installed all of the needed prerequisite packages that Gitpod uses, as well as what our code requires. It also permanently installed the AWS CLI and the PostgreSQL client we configured in previous weeks.
For consistency, it also created a bootcamp user to run everything under, and used bash as the default shell.
Under The Hood – devcontainer.json
The devcontainer.json file contains the configuration for the Dev Container once it starts up. It has configuration options for the following:
- Forwards local ports to the Dev Container and names them.
- Installs the VS Code extensions.
- Sets the default terminal to bash.
- Pulls the set environment variables from the local machine into the Dev Container
- Changes the user used inside the Dev Container to bootcamp.
- Runs the npm install and pip install once the Dev Container has started as a postAttachCommand.
Because of the way Docker Desktop and the virtualization works, it wasn’t possible to install Docker inside of Docker. Instead, there is a feature called docker-in-docker, which extends the ability to create child containers inside the container, independent of the host’s docker instance. It also installs the Docker extensions inside the container, along with the needed CLIs.
This allows you to run your application as a Docker container, inside a Docker container…

Troubleshooting – Address already in use
If you run your docker compose up and it fails with this error:
Error response from daemon: driver failed programming external connectivity on endpoint cruddur-frontend (313dc8a7ec956675812ac6d921d2c78da578b57e12684afc454c4d384ccf31a9): Error starting userland proxy: listen tcp4 0.0.0.0:3000: bind: address already in useYou can try closing the Dev Container, VS Code, Docker Desktop, and restarting. You may even want to restart your machine. You can run netstat -o -a -n to see what PID might be using the port.
Troubleshooting – Github SSH Keys
If you use SSH instead of HTTPS to access Github, you may run into errors attempting to commit and push code to your repository with this error:
[email protected]: Permission denied (publickey).
fatal: Could not read from remote repository.
This page describes the scenario and the solution. To get the VS Code extensions to be able to forward the request to your local SSH agent, you can run the following to add the path to your SSH private key to the agent:
ssh-add ./path/to/id_rsaIf you restart the Dev Container afterwards, it should be able to access your repository without issue.
Conclusion

Dev Containers are an existing technology which is what many Cloud Development Environments are built off of. They allow us to maintain a consistent development environment as code to be able to share and reuse.
Resources
- Github – LinuxTek Canada – Dev Containers Code Repository
- Visual Studio Code Documentation – Developing inside a Container
- Development Containers Project Website
- Windows 11 – PowerShell – Environment Varables
- Working with the Dev Container CLI
- Github – Dev Containers CLI
- YouTube – Dev Containers Beginner Series
- XKCD – Compiling
![]()
Hi!
Thank you for writing and providing this amazing alternative.
I’m running the command `devcontainer open` and nothing happens.
The container was built successfully and I’m able to see that under the dock container images.
When trying to run it in the UI, it starts and immediately stops. No errors are shown.
I’m using macOs.
Do you know what may I be missing?
Thank you!
Hey Guilherme, i am not sure if you are still facing this issue. There is a simple fix to this.
1. Exit the Vs Code
2. Log back in again
3. On the right hand bottom corner, there will be a pop-up showing that the project contains a devcontainer file, do you want to run it in its own container. —> CHOOSE YES THERE
4. You will see a new container window launch up and the steps mentioned above by Jason will start getting executed. like pip install, npm install and so on.
5. On top of the VS Code window you will clearly see [Dev Container: Free AWS Bootcamp* ]
Hope this helps.
Sometimes it works this way, sometimes not.
Most of the time I get an error when proceeding this way that the container cannot be initialized.
Once it is, I’m not able to set up the container env, even though I’ve set my local variables correctly and can list them when using grep | env properly.
I’ve tried to see many tutorials on the internet and created a reference file within the container, but it doesn’t work for me.
Great job – Many thanks!
Thank you so much you are just amazing. My credits just got finished and I was thinking how I could migrated to my mac locally when i found this on the discord channel.
I’ve got some tips to add on this for Mac that one of the fellow Bootcampers owensound did the hard work to test out. For example, we both ran into issue opening the dev environment on Mac – the “devcontainer open” CLI command doesn’t seem to work, but you can do it through the VS Code UI.