
Introduction
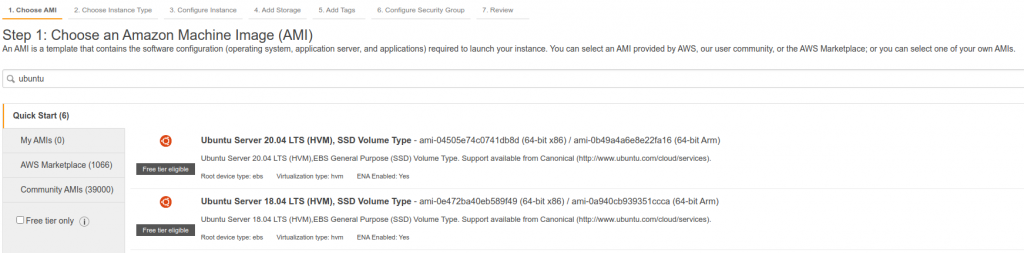
When deploying new VMs on a public cloud platform such as AWS or GCP, the base OS is typically available as a pre-built image, eliminating the need to go through the initial OS install. For example, on AWS, Ubuntu Server is available as an Amazon Machine Image:
When working on-premise, for example with VMware vSphere, you will typically have to make your own templates by creating a VM, installing the OS, configuring and updating it, and then saving it as a template. This involves a lot of time, and if anything needs adjusting, the process will need to be repeated manually to create another template.
Enter Hashicorp Packer. Packer is an open source tool that allows you to build automated machine images from a source template. Packer has build plugins for numerous platforms including AWS, GCP, Docker, and VMware.
The goal of this project is to take the Ubuntu 21.10 Live Server ISO, and automatically build a template using VMware vSphere.
Research and Credit
Because Ubuntu Server 21.10 is fairly new, I could not find any other pre-built Packer files to do what I wanted. The closest I could find was a blog post from Efkan Isazade on automating the Ubuntu 20.04 Live Server template generation. I heavily referenced from his Github repository, but quite a few modifications were needed to get this to work on Ubuntu 21.10.
Changes Needed
Looking at older guides and documentation, the autoinstallation in previous versions was done using a preseed file. Starting with Ubuntu 18.04 Live-Server, the installer has been updated from the Debian installer which used preseed, to using subiquity. In order to perform an automatic installation (autoinstall), cloud-init is used. More details can be found on this Canonical page.
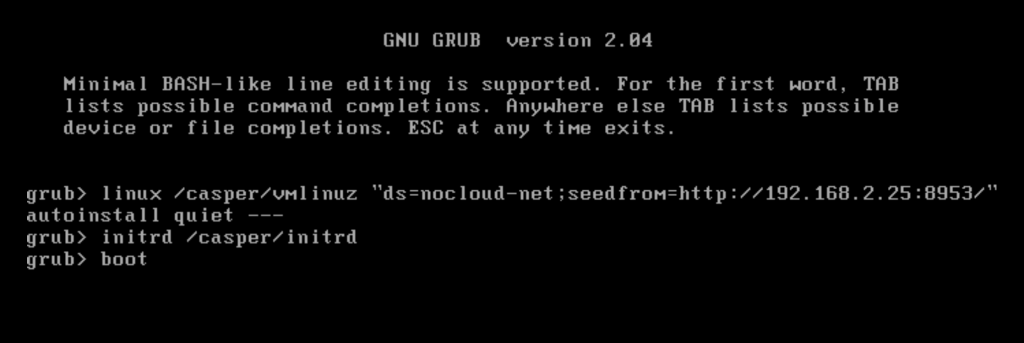
As part of the initial boot, Packer starts an HTTP server, and the meta-data and user-data files are passed over using the nocloud data source. The tricky part was adjusting the boot_command sequence used as Ubuntu Server started, to pass the proper commands for this to work. In the end, I managed to get it working with the following:
boot_command = [
    "c",
    "linux /casper/vmlinuz \"ds=nocloud-net;seedfrom=http://{{.HTTPIP}}:{{.HTTPPort}}/\" autoinstall quiet --- ",
    "<enter><wait>",
    "initrd /casper/initrd<enter><wait>",
    "boot<enter>",
  ]
Once the autoinstall is able to run using the configuration in user-data, it will perform an unattended install, updated, and reboot. Packer will wait for it to detect an IP address, and then for SSH to become available. Once completed, it will log in using the username and password set (ubuntu/ubuntu) and run the cleanup script stored in the scripts folder, then shut down the VM, convert it to a template, and destroy the temporary VM used to build.
One note – the hashed password stored in the user-data file is “ubuntu”, generated using the following command:
mkpasswd -m SHA-512 --rounds=4096Usage
To use the Packer scripts, clone the Github repo, to download all of the code locally. This should give you a Packer > Ubuntu-21.10 folder. I’ve included a README.md file here, which has further steps for configuring the vsphere.pkrvars.hcl file with the details for your VMware environment details.
Be sure to download the Ubuntu Server 21.10 Live Server ISO file here, and upload it to your vSphere server datastore. I use an ISO folder on my main datastore. You can do this through vCenter by going to the Datastore icon ![]() and selecting your datastore, then creating a folder, for example ISO. There is an option in the web interface to Upload Files, and you can upload the ISO easily this way.
and selecting your datastore, then creating a folder, for example ISO. There is an option in the web interface to Upload Files, and you can upload the ISO easily this way.

Build Process
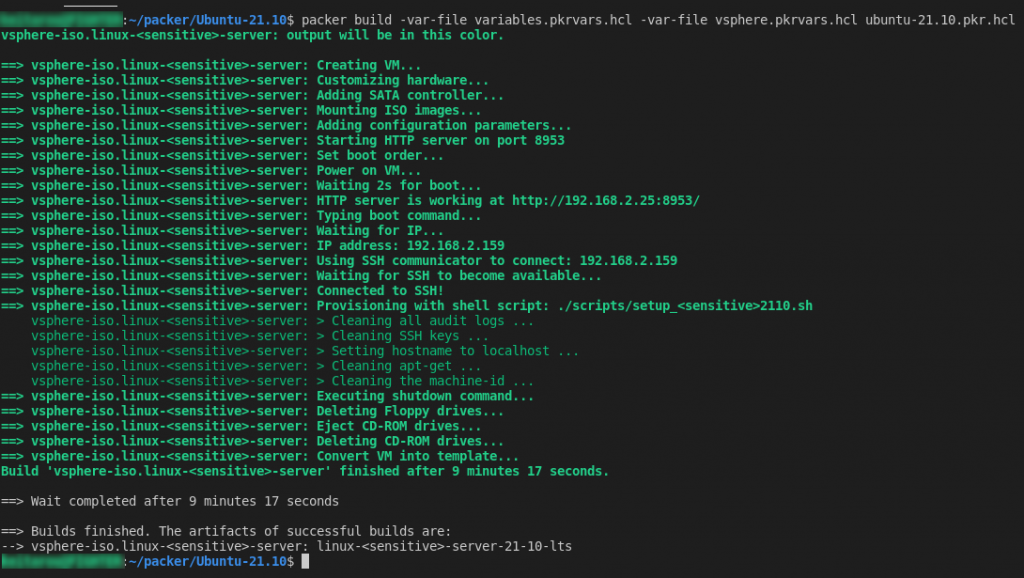
On your local machine, with Packer installed, run the following command in the Ubuntu-21.10 folder to start Packer:
packer build -var-file variables.pkrvars.hcl -var-file vsphere.pkrvars.hcl ubuntu-21.10.pkr.hclThis should start the build process, and create a virtual machine on vSphere called linux-ubuntu-server-21-10-lts. If you open the web console for this VM quickly, you should see the commands being automatically entered to specify how to boot and use cloud-init:
The subiquity autoinstaller should run for a bit, and run the commands set in the http/user-data file. This includes installing the following packages:
cloud-init, curl, net-tools, open-vm-tools, openssh-server; as well as running an apt update and apt upgrade to refresh any available default packages.
The autoinstall should take about 10 minutes to complete, and will reboot once before Packer is able to connect in with SSH to complete the build steps. The final Packer output should look like this:
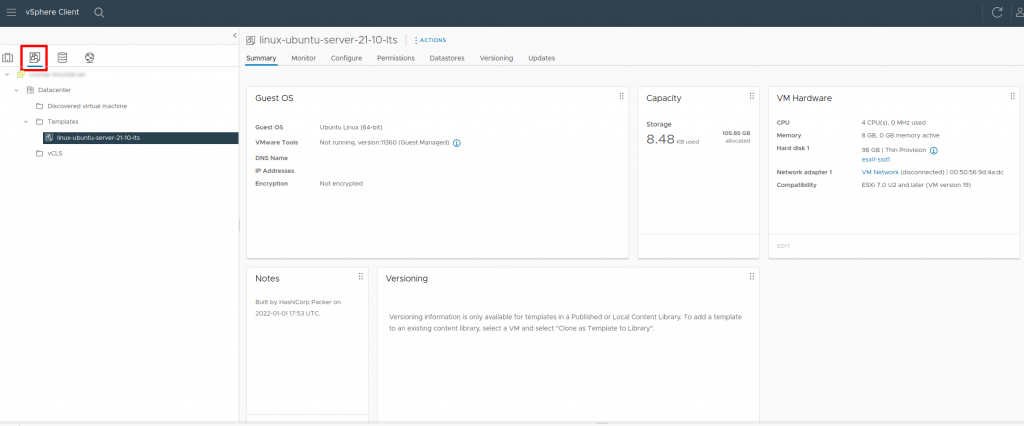
Once complete, if you check your Templates folder on VMware, you should have a new template called linux-ubuntu-server-21-10-lts, ready to be used to create new VMs.
Conclusion and Next Steps
Now that we have a pre-built VMware template for Ubuntu Server 21.10, the next step is to define all of the infrastructure needed for a Kubernetes cluster using Terraform.

![]()
2 thoughts on “Building an Ubuntu 21.10 vSphere template using Hashicorp Packer”