
Introduction
One of the recent challenges I took on was to build a URL lookup service. The tech challenge was stated as follows:
URL lookup service
We have an HTTP proxy that is scanning traffic looking for malware URLs. Before allowing HTTP connections to be made, this proxy asks a service that maintains several databases of malware URLs if the resource being requested is known to contain malware.
Write a small web service, in the language/framework your choice, that responds to GET requests where the caller passes in a URL and the service responds with some information about that URL. The GET requests look like this:
GET /urlinfo/1/{hostname_and_port}/{original_path_and_query_string}
The caller wants to know if it is safe to access that URL or not. As the implementer you get to choose the response format and structure. These lookups are blocking users from accessing the URL until the caller receives a response from your service.
Give some thought to the following:
-The size of the URL list could grow infinitely, how might you scale this beyond the memory capacity of this VM? Bonus if you implement this.
-The number of requests may exceed the capacity of this VM, how might you solve that? Bonus if you implement this.
-What are some strategies you might use to update the service with new URLs? Updates may be as much as 5 thousand URLs a day with updates arriving every 10 minutes.
All of the code for this challenge, usage information, as well as a detailed technical breakdown of the response to the additional considerations can be found in this Github project – malware-url-check. This article will focus on some of the thoughts going into the design and architecture, as well as sharing some of the troubleshooting and lessons learned from spending so much time working on this project. I hope you find the information useful.
Architecture
From some quick searching, I found a number of other examples of this type of project. Some were built to run on a VM, or in a Docker container. Some used Ruby, Redis, Java, MySQL and other components. Scaling to meet the additional considerations could be complicated, as you’d have to add load balancers, additional servers or containers, and a complex front-end/back-end architecture. Keeping the database scalable and available would also be a challenge, as you’d have to consider multiple locations, database replication, backups, etc.
I decided to do approach the challenge a bit differently, and went for an entirely serverless infrastructure, completely built using Infrastructure as Code.

I was confident I would be able to build all of the components in AWS using Terraform, and do some programming in Python for the Lambda functions. I already had a bit of familiarity with using and updating Lambda functions.
I worked backwards when building the architecture. I tried to test out everything as I went.
Build Process – DynamoDB
I went with DynamoDB as it is a fully managed, serverless, NoSQL database. DynamoDB offers built-in security, continuous backups, automated multi-Region replication, in-memory caching, and data export tools. Because the database backend wasn’t very complex and didn’t require multiple tables, but could grow to thousands of URLs, I wanted a non-relational database.
I started by building the DynamoDB using Terraform. I did this manually using the aws_dynamodb_table resource, but ran into a few issues. Eventually I switched to using the dynamodb-table AWS module from Anton Babenko for speed’s sake and a clean deploy.
I went with a Provisioned billing mode over On-Demand, as it was easy to limit the read/write capacity for this proof of concept, but it could easily be increased.
The database had a very simple attribute setup:
attributes = [
{
name = "BlacklistURL"
type = "S"
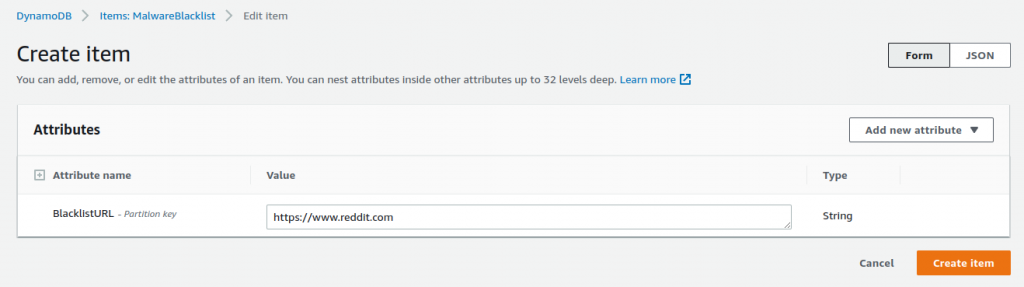
}This sets up a way to store URLs as strings in “BlacklistURL”. Once I had the database built, I tested it by going to the AWS Console DynamoDB section, and manually adding a few items:
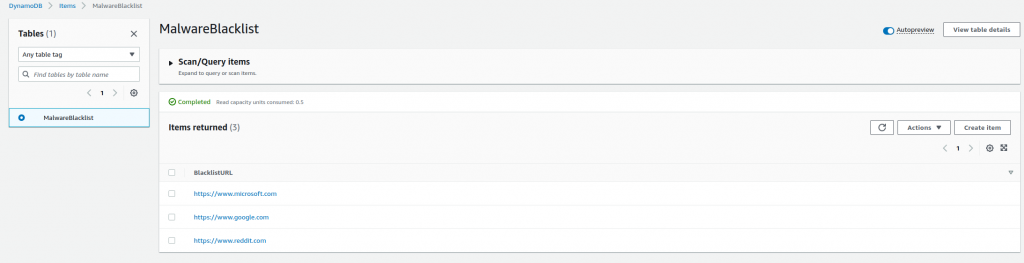
From the DynamoDB menus under Tables > Explore Items, I can see the items being successfully added:
Build Process – Lambda Functions
Now that the database was set up and available in AWS, I had to start coding my Lambda functions. I decided to use Python, and I was aware of a few modules I could use to simplify my coding.
Boto3 is the AWS SDK for Python. It allows you to directly create, update, and delete AWS resources from your Python scripts. Now while I will be using Terraform for handling all of the infrastructure, this did give an easy way to interact with DynamoDB. The DynamoDB Developer Guide had a number of examples that I was able to reference.
Although I could have used one Python script and had different behavior based on the event, I decided to have two separate Lambda functions to make the routing of the requests more logically separate. I started by building the getMalwareCheck.py function to read from the database and check for the URL, and then did the postMalwareCheck.py to add new values to the database.
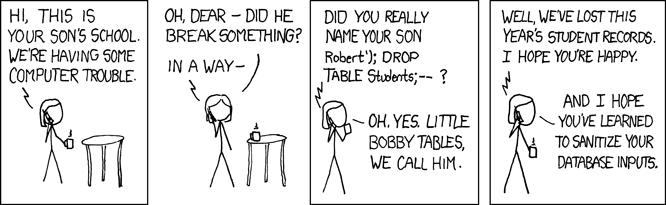
I set up the client connection to the database, specified the table, and then set up a variable for the input to the function. I used the validators Python library to do a quick check on the input to make sure it was a proper URL. This let me make sure nothing could sneak into the URL string, and avoid an XKCD “Bobby Tables” scenario:
I queried the DynamoDB table with the key, and pulled the Count value from the response. I used Count rather than ScannedCount, even though they matched, as Count is the number of items returned after the filter was applied, and ScannedCount is the number of matching items before the filter was applied. It made sense that if I was going to add any additional filters, I’d want to make sure to get the value after applying any filters.
Once the Python was ready, I was able to run it locally, providing hardcoded inputs, and verify if I was able to get results from the table properly, or add to the table; checking in the AWS Console.
Once everything checked out, I tested running the Lambda functions locally using the python-lambda-local project. I wrote some JSON files with the inputs that the functions would expect to get to test with as input.
Once that worked, I wrote the Terraform to build the Lambda functions. One of the neat things I found that you could do is specify a data object, that would auto-build the Python code as a zip file:
data "archive_file" "malware_post_zip" {
  type        = "zip"
  source_file = "../python/postMalwareCheck.py"
  output_path = "../python/postmalwarecheck.zip"
Note that this only works in simple cases. If the deployment package is larger than 50MB, direct upload isn’t possible. Typically you would need to upload the zip file to an S3 bucket then call it to the Lambda function from there.
Build Process – Lambda Layer
Once I had the Lambda function loaded in AWS, I tried to run it and it immediately failed with an “Unable to import module” error. This is because the libraries needed were not included or packaged with the Python code. I’ve blogged previously on how to set up a virtual environment for Python, and this can be used to install all of the requirements, which can be copied from site-packages into the zip file with the Python code to allow it to run.
I chose to do a Lambda layer instead, as it could be specified easily in Terraform along with the Lambda functions, and could be reused for multiple functions. A Lambda layer is a .zip file archive that can contain additional code or other content. A layer can contain libraries, a custom runtime, data, or configuration files.
To create the Lambda layer, I followed part of this article, created a site-packages folder, then used pip3 to install all of the libraries into it:
1. Create a directory where we want to install our requests package: mkdir -p layer/python/lib/python3.9/site-packages
2. Run pip3 install <package> -t layer/python/lib/python3.9/site-packages/
3. Access the layer folder: cd layer
4. Zip the python folder containing all of the required files: zip -r mypackage.zip *
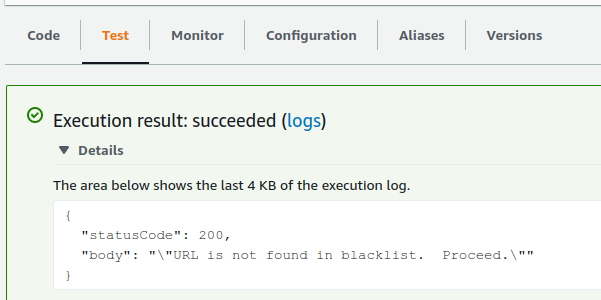
5. Copy the zip file to a location where it can be referenced by Terraform.Once I added the Lambda Layer to the Terraform resources, I was able to test the Lambda functions successfully in the AWS console:
Build Process – API Gateway
Building the API Gateway was the trickiest part of this project as I was the least familar with it. I looked at a number of examples to get some reference on how to do this. I knew I wanted to use an HTTP API instead of a REST API for simplicity, and because HTTP would be cheaper, which wouldn’t really matter in production, but for a proof of concept it would be sufficient. I found this Youtube video to be the most helpful, but I read a lot of documentation while going through building this.
The basic breakdown is:
- Create the API Gateway itself.
- Create a Stage for deployment. In my case I used the $default stage, which was set to auto-deploy.
- Create two Routes for the HTTP GET or POST traffic to be picked up, and send to their respective integrations.
- Create two Integrations to pass the HTTP GET or POST traffic to be passed to the proper Lambda function.
- Add permissions so the API Gateway has permission to invoke the Lambda function.
This last part proved to be rather tricky. There is an option in the integration Edit options, where you can enable this as a radio button.

This can be set up in Terraform using an aws_lambda_permission resource.
Lesson Learned: Even though this option may show as enabled in the AWS Console, you may not have the proper permissions. I recommend you do NOT add a statement_id, as it is optional and will be generated by Terraform. I got a lot of errors about “The IAM role configured on the authorizer or API Gateway doesn’t have permissions to call the authorizer. Check the permissions and try again“, and spent a lot of time troubleshooting before I figured out this was the problem. Alternatively, you can disable or not include this option, but then you have to set up an IAM role, policy, etc to give the API Gateway resources permission to invoke the Lambda function manually. I switched between two options while troubleshooting, but eventually got the first to work properly.
Build Process – CloudWatch

Although CloudWatch was not part of the original architecture, it was extremely valuable when troubleshooting and debugging. CloudWatch allows you to publish log groups from the various components to one place, making it easier to diagnose failures.
The first thing was to create the log groups for each component. I was mainly concerned with getting some data on what was coming in to the HTTP API Gateway, and what was coming in to the Lambda functions. I set up log groups for each of these, and a policy to allow give permissions for logging to CloudWatch.
Lesson Learned: The API Gateway will return an HTTP 500 “Internal Server Error” with no details by default. This makes troubleshooting very difficult. There are a number of documents to help diagnose this. To help understand the failure, adding the following logging variables to the API Gateway Stage was helpful. I did this as an encoded JSON block:
access_log_settings {
    destination_arn = aws_cloudwatch_log_group.api_gw.arn
    format = jsonencode({
      "requestId" : "$context.requestId",
      "extendedRequestId" : "$context.extendedRequestId",
      "ip" : "$context.identity.sourceIp",
      "caller" : "$context.identity.caller",
      "user" : "$context.identity.user",
      "requestTime" : "$context.requestTime",
      "httpMethod" : "$context.httpMethod",
      "resourcePath" : "$context.resourcePath",
      "status" : "$context.status",
      "protocol" : "$context.protocol",
      "responseLength" : "$context.responseLength",
      "integrationErrorMessage" : "$context.integrationErrorMessage",
      "errorMessage" : "$context.error.message",
      "errorResponseType" : "$context.error.responseType"
    })
Having all of these log to CloudWatch made it much easier to determine the cause of an HTTP 500 “Internal Server Error”. This article gave a bit of a clue when there was a falure without a lot of logging.
For the Lambda function, it was very helpful to get the raw event data being passed into it. I got a lot of errors that I was getting tripped up on the ‘MalwareURL’ string. From looking at the CloudWatch data and parsing the raw event data, I could see that the URL parameters I wanted were being stored in a queryStringParameters section, so I adjusted the Python script to pick this up.
Testing
To test the entire setup, I mainly used Postman to craft HTTP GET and POST messages. Thankfully there is a Linux 64-bit version, although the only way to easily install it is with snap.
When testing with Postman, I could add the HTTP API Gateway Invoke URL, select the type of HTTP request, and add the MalwareURL as a parameter:
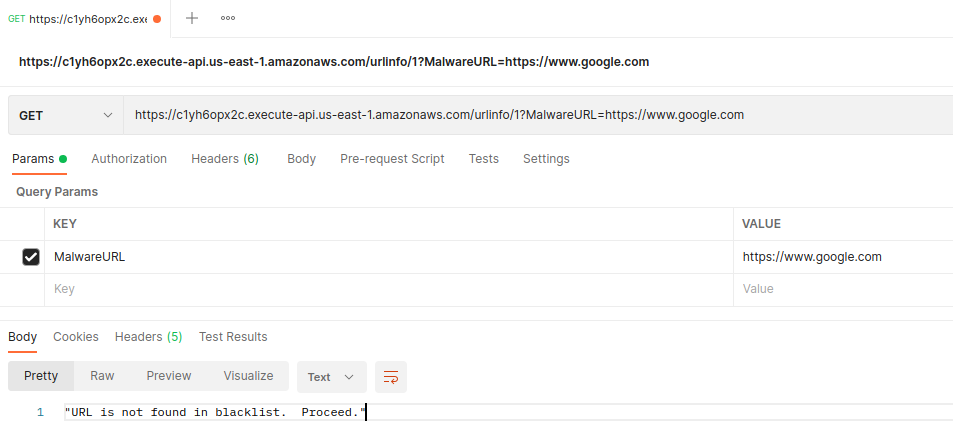
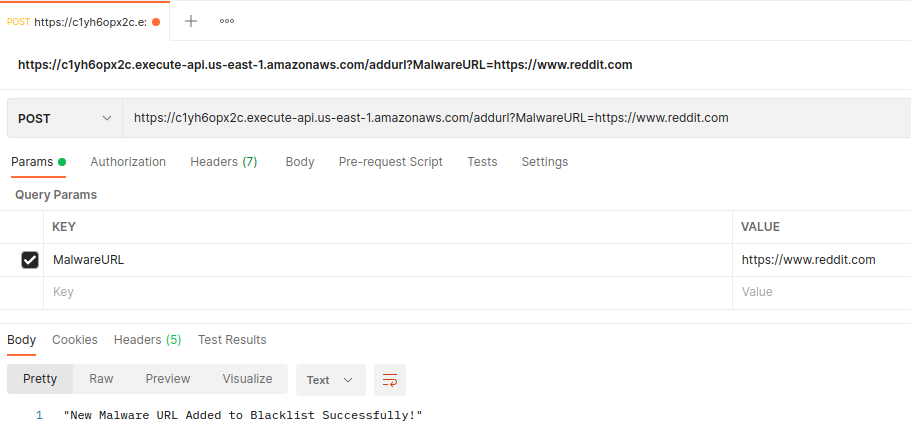
Postman also made it easy to see the response getting returned after sending the HTTP request.
It is easy to send an HTTP POST or GET using a curl command as well, which I’ve documented in the Github repo.
Conclusion

This challenge took about 30 hours total of work, including a few false starts, lots of research, and about 8 hours of troubleshooting and debugging. This was a lengthy challenge which really tested my limits of Terraform, Python, and AWS. I would definitely recommend this type of challenge for someone looking to understand these tools better.
![]()