
Introduction
After my previous article where I used Amazon Lightsail to migrate my blog to an Amazon Lightsail VPS (Virtual Private Server) instance, I decided to try out the Lightsail Container Service to see if it was similarly easy to use.
The use case here would be that in some cases for testing a service in a Docker container, it would be easier to deploy it on a service like Lightsail, rather than spinning up an entire environment using AWS Elastic Container Service, or Elastic Kubernetes Service. While both of these services can use AWS Fargate for serverless container workloads, there is a lot more infrastructure that needs to be built in order to run the container.
Amazon Lightsail Container Service provides an easy way to run your containers in the cloud, and is ideal for simple workloads.
Lightsail Container Service Details
Before getting started, it’s important to understand how the service is designed.
While Lightsail provides a simplified deployment method, it’s important to understand that under the hood, the service is powered by many of the other AWS services, such as Amazon Elastic Compute Cloud (Amazon EC2), Amazon Relational Database Service (RDS), Application Load Balancer, etc. For more details see this blog post.
Within a Lightsail Container Service, there are multiple nodes running the containers, and a load balancer.
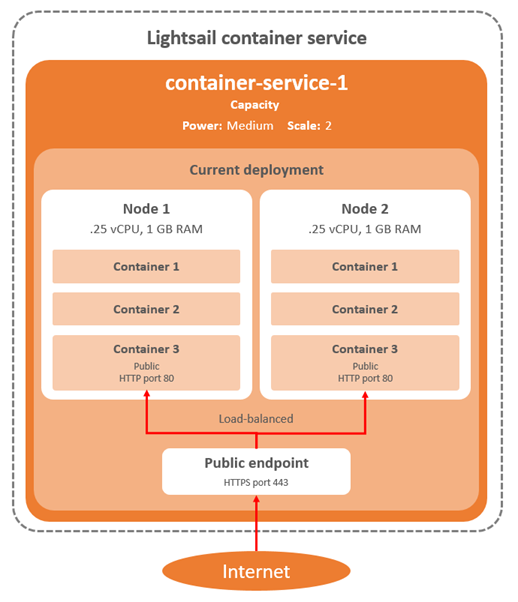
The Scale and Power are both capacity parameters that can be set when creating the container service. The scale specifies the number of compute nodes in your container service, and the power specifies the memory and vCPUs of each node in your service.
These values can be changed dynamically in the Lightsail console after the initial creation without any downtime, allowing to adjust for over/under-provisioning.
Running Minecraft

Minecraft is a good test for a service like Lightsail, as it will put some stress on the service. Althought it’s not quite load testing, when logging onto a Minecraft server, you can immediately tell if the service is struggling by looking at statistics like CPU and memory usage, latency/lag, and any errors in the Minecraft console CLI.
I’ve written a number of articles on how to set up Minecraft on a server, including automating the install using Ansible. For testing Minecraft as a Docker container, I will be using the itzg/minecraft-server Docker image, as it is already built and well maintained. More information can be found on the Docker Hub page, and Github.
Setting Up Lightsail
In the AWS Console, you can search the services for Lightsail, or go directly to the Amazon Lightsail Console. Once there, click on Containers:
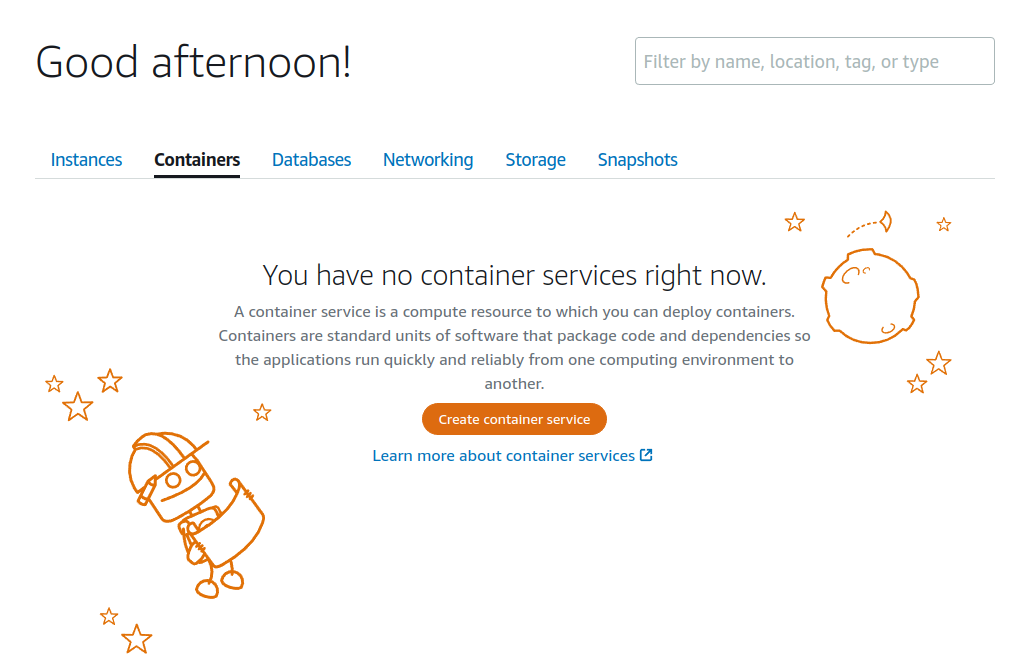
Click the “Create Container Service” button, and go through the menus to set up the container service:
- Location – We will leave the default as us-east-1.
- Container Service Capacity – As Minecraft needs a decent amount of RAM to run, we will choose Md (Medium) size for 2GB RAM and 1vCPU. The Docker container will try to use 1GB for Minecraft by default, so smaller sizes would not be recommended.
- Scale – Since everything is self-contained, we will only choose x1 instance to run.
- Deployment – Click the +Set Up Deployment button and choose Specify a custom deployment.
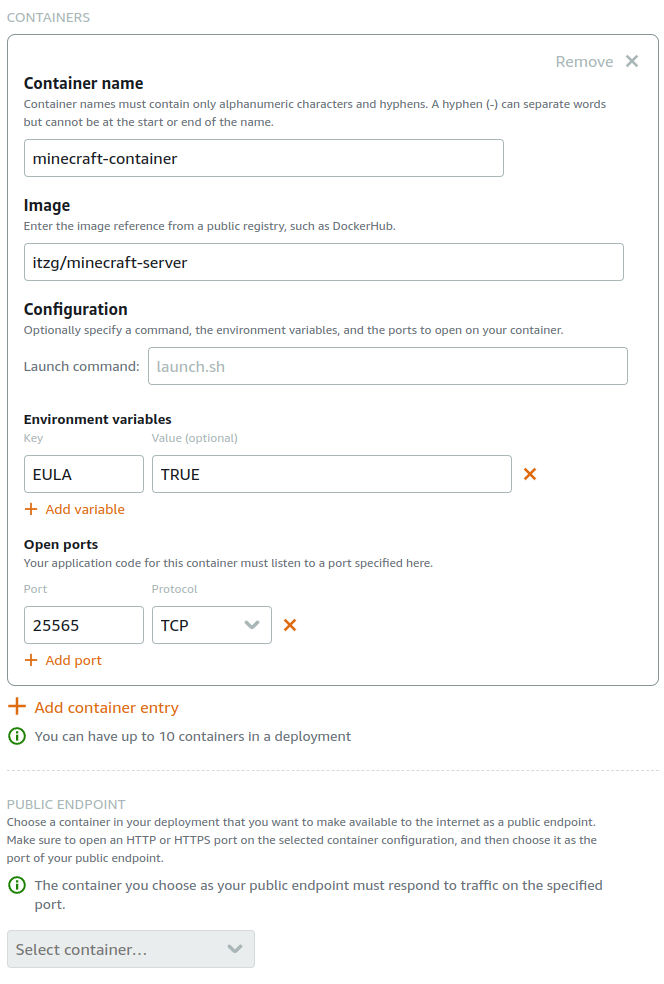
- Container Name – Set this to minecraft-container.
- Image – As the image is already located on Docker Hub, we can enter itzg/minecraft-server as the image to pull from the registry.
- Environment Variables – As per the itzg/minecraft-server documentation, we can auto accept the EULA for Minecraft during setup by setting
EULA: TRUE. We will add Key = EULA, Value = TRUE to ensure this is set automatically. - Open Ports – Minecraft typically allows users to connect on TCP Port 25565, so we will open this port.
- Public Endpoint – Leave this unselected for now. More on this later.
- Under the “Identify Your Service” section, we will name the service minecraft-service.
Once complete, the settings should look like this:
Review the Summary section and be aware of the cost of the container service:
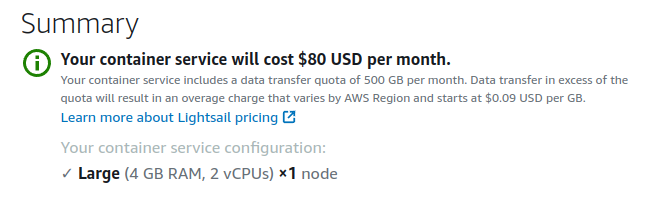
As we will be temporarily testing, this shouldn’t incur a large monthly charge. However, be aware that you are charged for your container service whether it’s enabled or disabled, and whether it has a deployment or not. You must delete your container service to stop being charged for it.
Click the Create Container Service button once everything is filled out:

It may take a few minutes for the service and deployment to load. Once the service is available, you can click on Deployments, and Open Log to see the progress as the container starts up:
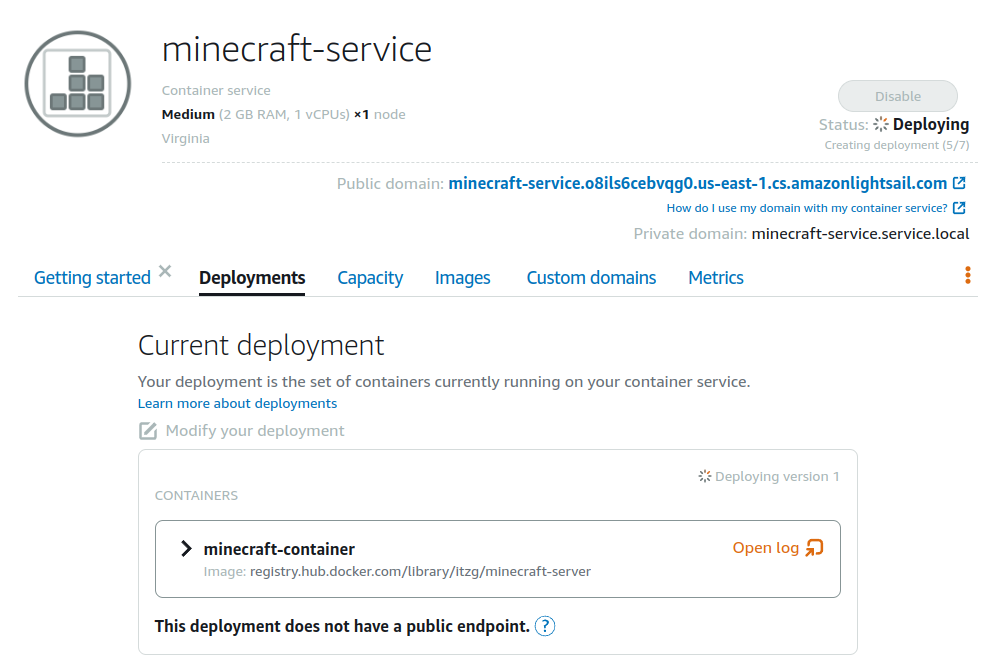
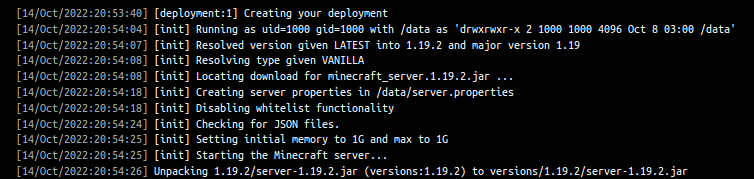
The Logs screen will show the progress as the Docker container is initialized, and the Minecraft server is launched:
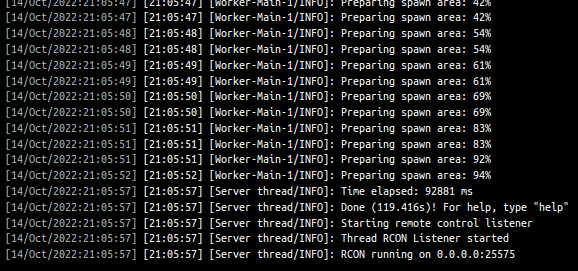
Wait until the Minecraft world completes generating. It should look like this when complete:
Connecting to the Minecraft Server
The Minecraft server is now running, but we haven’t set a public endpoint to connect into the container service via the internet, so there is no way to connect. Unfortunately, there is a limitation of Lightsail Containers where the public endpoint can only be HTTP or HTTPS, due to the way the Application Load Balancer is set up. This article confirms the limitation:
The public endpoint of Lightsail container services supports HTTPS only, and it does not support TCP or UDP traffic. I did test trying to find a way around this, such as using an NGINX Reverse Proxy to stream the traffic via an open HTTP/HTTPS port to the internal port 25565. This project seemed promising and was designed for a similar function, and when tested locally, would forward the traffic on an HTTP port on to the Minecraft server and allow a client to connect.
Unfortunately the web server container would fail health checks and get terminated; since the web traffic would be passed to Minecraft, which wouldn’t know how to respond. Adding a separate active health check is a feature of the paid version of NGINX – NGINX Plus.
So unfortunately while the Minecraft server does appear to run on Lightsail Containers, we are not able to connect to the server to test with a Minecraft client.
Other Limitations
Initially, rather than using the Amazon Lightsail web console, I wanted to define all of the infrastructure as code using Terraform. Unfortunately, Lightsail components are not fully included in the official AWS Terraform provider. Some of the components, such as the Lightsail Container Service and Lightsail Instance are available, however others such as Load Balancer resources are not currently available. There are open Pull Requests on the Hashicorp Github, but they have been sitting for a few years now. They would need to be upvoted to increase priority. Something to be aware of if you’re looking to leverage Lightsail fully with Infrastructure-As-Code – some of the components may not be available.
The AWS CLI v2 does have a full set of commands for Lightsail, which can be helpful if you don’t want to use the web console.
Troubleshooting
When creating the Lightsail Container Service for the first time, I received this error:
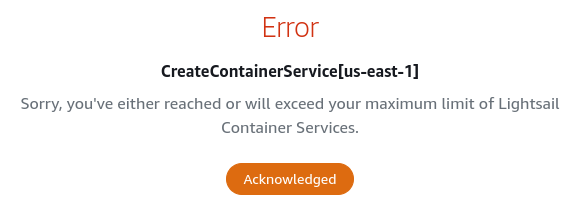
CreateContainerService[us-east-1]
Sorry, you've either reached or will exceed your maximum limit of Lightsail Container Services.
This was puzzling because I didn’t have any other Lightsail Container Services active.
Checking in the Service Quotas section in AWS, the quotas for Amazon Lightsail appear to have enough capacity by default to allow the service creation, although the Lightsail quotas cannot apparently be changed or increases requested.

Investigating further, this documentation gave information on how the CreateContainerService API call works, but it didn’t point out the specific issue.
The problem ended up being that I was initially trying to create a Large capacity container. Once I switched to testing with a Medium size, it worked fine. I spoke with some contacts via the AWS Community Builders Program, and was advised that the error messages around this type of scenario are being improved, and if you hit this issue, to contact Customer Support for assistance, and they should be able to help.
Conclusion
Lightsail Containers are an interesting service, which currently can be leveraged for hosting web applications running inside containers, as well as running other workloads. There are some limitations, but intial setup can be a lot easier than a full ECS/EKS setup.
This article only goes through a basic test. There are a number of other features in Lightsail Containers which allow communication between containers in a deployment, and horizontal scaling.
Definitely review the documentation and make sure that your use case would be suited to running as a workload on Lightsail. This FAQ may answer some of the more common questions, and this demo video (while a bit older), may be an interesting watch:
Resources
- Amazon Lightsail Documentation
- Amazon Lightsail Container Service Article
- Amazon Lightsail Containers Blog Article
- Amazon Lightsail – Changing Container Service Capacity
- Amazon Lightsail – Public Endpoints and Domains
- Amazon Lightsail – Frequently Asked Questions
- AWS CLI Lightsail Commands
- itzg/minecraft-server Docker Hub
- itzg/minecraft-server Github
![]()