
Update – 02/10/2022
Since this post, I’ve done some major refactoring to the code base. More details in this blog post. Some of the steps to use the project are slightly different. Please refer to the blog post, and the README.md in the Github project for the most up to date instructions.
Introduction
When I initially started running Minecraft servers, I set them up manually using guides I found online, and I was very unfamiliar with using cloud platforms. I got started on Google Cloud Platform using a guide that has since been turned into this Qwiklab: Setting up a Minecraft Server on Google Compute Engine. I also found this course from A Cloud Guru to be very helpful: Creating your own Minecraft Server. It was especially helpful in understanding how to set up Minecraft to run as a systemd service.
Since then, I’ve migrated the Minecraft servers in-house onto VMWare vSphere virtual machines. Again, this was done manually, which took hours to set up. Since then, I’ve been running backups and snapshots in case something happened, but if I lost those, I’d have to set up the servers again by hand.
The goal of this project was to automate creating a Minecraft server from scratch – from OS installation, VM deployment, and Minecraft server configuration. Ideally this would not be tied to my VMware infrastructure, and could be used on other cloud platforms if I needed to quickly spin up another Minecraft server.
The community who use the Minecraft servers are looking for a world reroll once Minecraft 1.19 is released with The Warden and The Deep Dark; as well as a Valhelsia Enhanced Vanilla 1.18 modded server. Spending the time on building the automation for this now, will make it much easier to set these up later on.
The OS installation portion was done via Hashicorp Packer, and the details outlined in this blog post. The virtual machine deployment on VMware was done with Terraform, and the details outlined in this blog post. The Ansible portion of this project outlined in this post completes the work.
What is Ansible?
Ansible is an open-source software provisioning, configuration management, and application-deployment tool enabling infrastructure as code. It is an open source community project sponsored by Red Hat. The term “ansible” was coined in science-fiction and has been used in many novels. My original exposure to the term was through Orson Scott Card’s novel “Ender’s Game“, where it referred to a way to remote pilot spacecraft across great distances instantaneously, without any time delay.

Ansible can work with multiple operating systems and platforms through the use of modules. For example, there are Ansible modules for Cisco IOS, so even router and switch configuration can be automated.
Complex tasks can be documented as an Ansible playbook, which is expressed in a YAML format which is easily readable. A playbook is composed of one or more ‘plays’ in an ordered list. The terms ‘playbook’ and ‘play’ are sports analogies. Each play executes part of the overall goal of the playbook, running one or more tasks. Each task calls an Ansible module.
One of the major advantages of Ansible over other configuration management tools like Chef, Saltstack and Puppet is that there is no agent to install on the remote systems in order to run. From the control node, Ansible manages machines and other devices remotely (by default, over the SSH protocol).
Prerequisites
For this project, there are a few things that should be set up beforehand.
The control node is the machine that will run Ansible and reach out to the remote hosts in order to configure. Python 3.8 or newer is required to be installed, and for this project, Ansible 2.9.8 or newer to address certain errors. More information on installing Ansible can be found here, and there are steps for setting up on Windows, MacOS, Linux, etc.
Once Ansible is set up on the control node, a new VM will need to be made available to run the Ansible playbook and install and configure Minecraft. The playbook is designed to be as distribution agnostic as possible, but not all scenarios could be taken into consideration or tested. Details on what was tested are available in the README.md file.
For the example, we will use an Ubuntu Server 20.04 LTS Amazon Machine Image (AMI) on Amazon Web Services. A Debian 11 “Bullseye” Linux installation was also tested on Google Cloud Platform. Please note that for this example, a non-free tier instance is required. A great way to test this project out is in A Cloud Guru’s Cloud Playground, where there is no cost to you. I consider an ACG subscription a great investment.

Configure AWS EC2 Instance
To create the EC2 instance, log into the AWS Console, and search in the top bar for EC2: ![]()
Click the orange Launch Instance button, and select Launch Instance.
Step 1: Choose an Amazon Machine Image (AMI)
Scroll down and select Ubuntu Server 20.04 LTS (HVM), SSD Volume Type. Ensure the 64-bit (x86) option is selected.
Step 2: Choose an Instance Type
Choose an instance type that has enough resources for running the server. Refer to this wiki documentation for how to scale resources based on the number of players. For this example, we will use a t2.medium instance, as there are limitations on the resources that can be created with Cloud Playground. Once the instance type has been selected, click Next: Configure Instance Details.
Step 3: Configure Instance Details
From this page, no changes should be needed, so click Next: Add Storage
Step 4: Add Storage
From this page, additional disk space can be added. Set the disk size to 20GB for some additional room during the example.
If this machine will be used semi-permanently, keep in mind that the Ansible Playbook sets up a backup script to back up the Minecraft world every 4 hours. The backup sizes will start small, but as the world gets explored and more players build, the backup sizes will increase. For the primary world which has been running for a few months now, the backups are approximately 3GB each, and saving 2 weeks worth of backups takes about 250GB of space. If this will be used regularly in the cloud, I would recommend configuring an AWS S3 bucket or Google Cloud Storage to store the backup files.
Once the disk size has been set, click Next: Add Tags to continue.
Step 5: Add Tags
Tags can optionally be set to add metadata such as a name, environment or version to AWS resources. For this example, we don’t need any, so click Next: Configure Security Group.
Step 6: Configure Security Group
On this page, the default rule allows SSH connectivity, however we will need an additional rule to allow a Minecraft game client to connect to the instance. Click Add Rule and fill out the following as below:

- Type: Custom TCP Rule
- Protocol: TCP
- Port Range: 25565
- Source: Anywhere
- Description: Minecraft Port
Once this is added, click Review and Launch.
Step 7: Review Instance Launch
From this page, the AMI is ready to be launched, but final configuration changes can be made. Any other changes can be made before proceeding. When ready, click Launch.
Step 8: SSH Key Pair
In order to SSH into the instance, it is best to create a new key pair. The private key will be downloaded to your local machine, and the public key will be stored on the server and added to the authorized_keys list. Choose the following options:
- Create a new key pair
- Key Pair Type: RSA
- Key Pair Name: minecraftkey
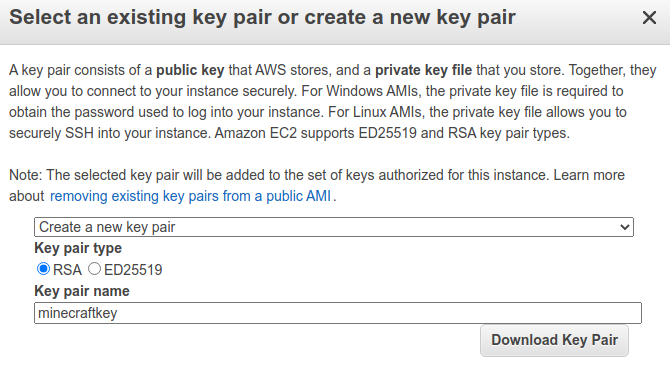
Click Download Key Pair and a minecraftkey.pem file should be downloaded to your local machine. Make sure to save this file, as it can’t be retrieved again later. Once you confirm you have the file, click the Launch Instances button.
You should get a brief progress window, and then a Launch Status Update that the instance is now launching. Click View Instances to go back to the EC2 instances menu.
Keep an eye on the Instance State. Once it shows as ![]() it should be accessible via SSH.
it should be accessible via SSH.
Configuring ansible.cfg to SSH into the EC2 Instance
The ansible.cfg file will need to be configured to use the minecraftkey.pem file that was downloaded. For an Ubuntu Server 20.04 LTS AMI, the username to log in is “ubuntu”. Set the remote_user = ubuntu, and private_key_file to the location of the minecraftkey.pem as below:

In order for Ansible to safely use the SSH key pair, access to the minecraftkey.pem file will need to be restricted to the current user. This can be done in the file properties through the OS, but on Linux this can be done by running the command:
chmod 600 minecraftkey.pem
Configuring the inventory file to point to the EC2 instance
Ansible can use a global inventory file, but for this example, we will use a local file in the same directory. The file simply needs the public IP address of the Amazon EC2 instance in order to connect via SSH. Refresh the EC2 Instances page using the Reload button ![]() and copy the Public IPv4 address shown. Edit the inventory file in the directory, and enter this address.
and copy the Public IPv4 address shown. Edit the inventory file in the directory, and enter this address.
Configure the Ansible Playbook with custom Minecraft values
There are a number of variables in the top of the buildminecraft.yml file that can be altered to customize the Minecraft server itself before it starts up.
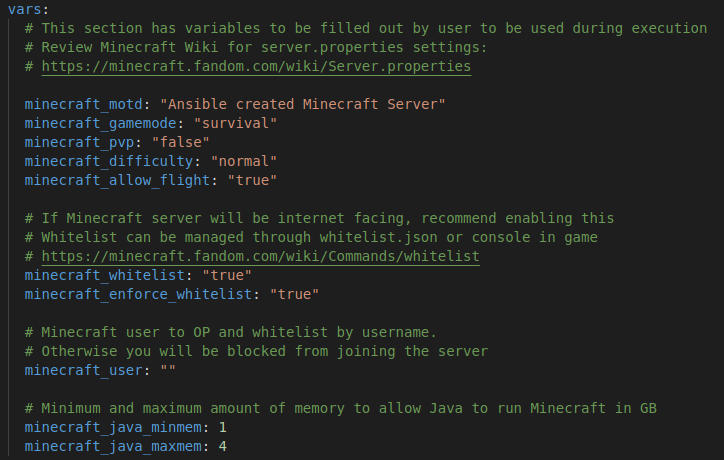
Review the vars section and adjust the values as needed. The Java minimum and maximum values should be configured based on the amount of RAM on the server, so that it won’t take up all of the resources. The Minecraft server is configured to use Aikar’s Flags for the most optimization possible.
Be sure to add your Minecraft username under the minecraft_user variable. This will ensure your user is given OP and whitelisted so it can join the server.
Not all of the server.properties values are configured via Ansible, so you may need to SSH into the server afterwards and edit the file if further configuration is needed.
Run the Ansible Playbook
Now that the files are configured with the IP address of the server, and the SSH key to connect, you can run the Ansible Playbook to kick off the configuration. Ensure you are in the minecraft-base directory with all of the configured files, and run the following:
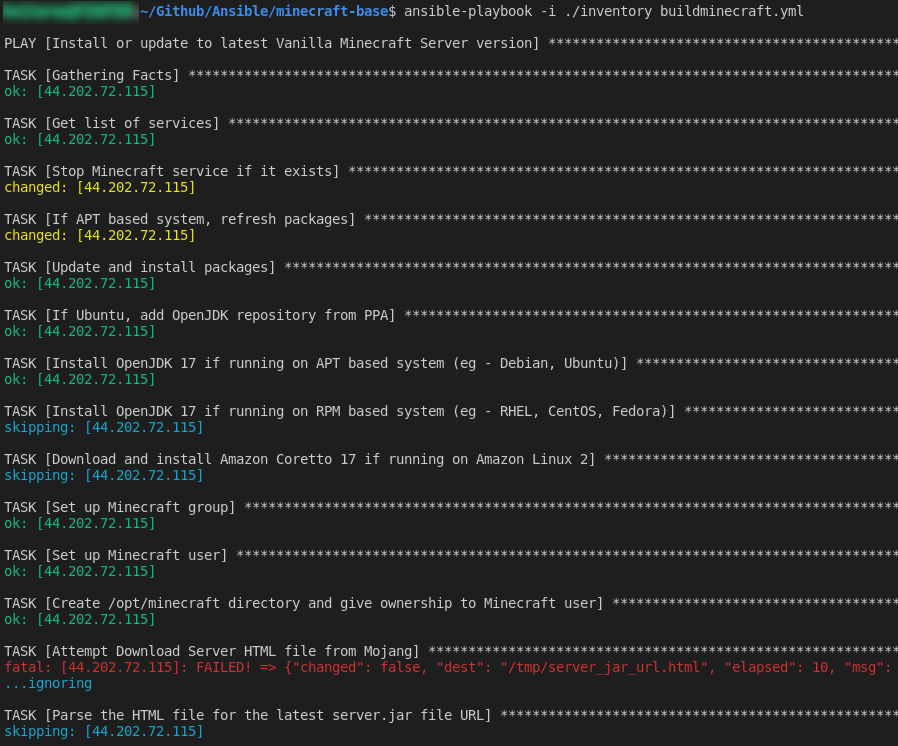
ansible-playbook -i ./inventory buildminecraft.yml
You should see plays in the playbook being completed with one of the following statuses:
- ok – The step completed but no change was made
- changed – The step completed and a change was made to the remote system
- skipping – The step was skipped. Some of the steps are OS specific, or only run under specific conditions.
- fatal – An error occurred. There is one step where this may happen while downloading the server.jar from the Minecraft website, but an alternative method was added as a backup. The failure of this step will not halt the progress of the playbook.
The playbook will run step by step and if everything works properly, you should see similar activity to the following:
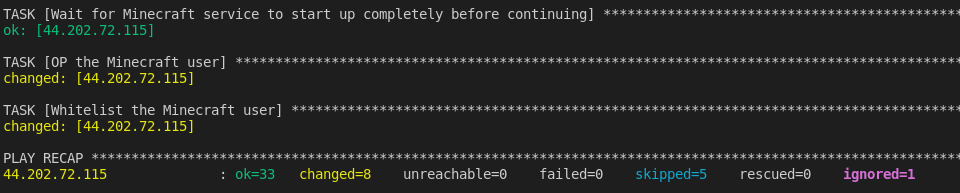
There will be a long pause on the task “Wait for the Minecraft service to start up completely before continuing” as the initial startup of the Minecraft server can take a while, as the world is being generated and the spawn area prepared. A check was added here to ensure that the world generation completes before continuing, but it will wait at least a minute before checking this.
If Ansible completes successfully, you should see a message similar to the following including a PLAY RECAP:
Join the Server
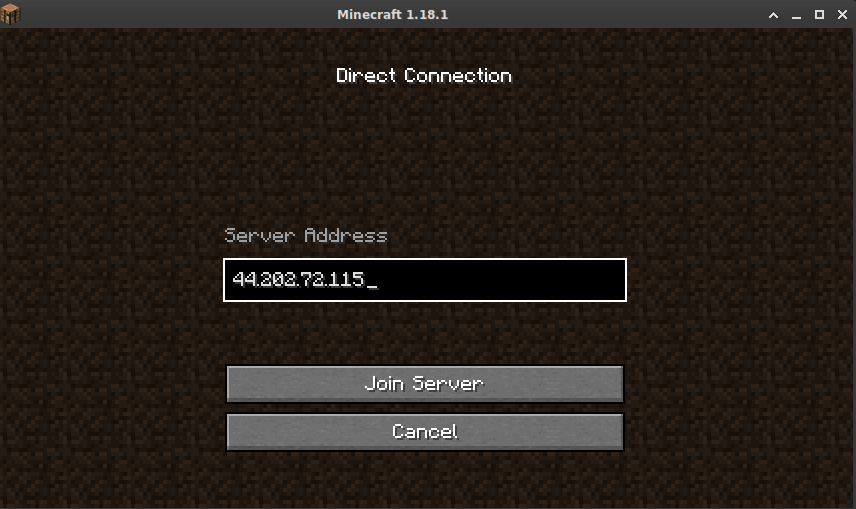
Launch your Minecraft client and ensure you are using the same version as the server. As of this post, the latest version is 1.18.1. Click on Multiplayer and select Direct Connection. Enter the IP address of the EC2 instance, and click Join Server. If everything has worked, you should be connected to a brand new Minecraft world!

Recommended Tasks
Once your Minecraft server is completely set up, if you plan to keep it, I would recommend the following:
- Secure the SSH user accounts. If you’ve used an SSH username and password, make sure they are secure and nonstandard. Using SSH keys instead of a password to access the machine is the most secure way. You may want to set up a separate SSH keypair for the minecraft user so you can SSH directly in as that account, especially if you will be accessing the Minecraft console directly using screen.
- Plan for your server backups. From experience, I can say that weird things happen when the server runs out of space. Users will start losing items, things will start glitching, and you’ll have trouble getting commands to run properly in SSH. As mentioned above, the amount of space the backups take will add up quickly, even with the automated cleanup. Look at using AWS S3 or GCP Cloud Storage. This old article has information on how I was using the gsutil command to copy the backups to a Cloud Storage bucket. Mounting a network share to /media/backups in the /etc/fstab file is another way to easily expand your storage capacity.
- Clean up your Cloud account. If you’re not planning on using the server for more than an example, make sure to terminate the EC2 instance so it doesn’t incur cost, and shut down your Cloud Playground sandbox.
![]()