Introduction
This article will go through the steps for migrating virtual machines from VMware vCenter/vSphere 7.0.3 to Proxmox 7.3-3 on separate physical servers.
Background
I’ve been using VMware products for virtualization in my homelab for many years. Many years ago, I had a few physical machines at home that I installed Linux on to run file sharing and other applications, but as I added more services into my home network, I found it beneficial to separate tasks out to separate machines. Eventually I built a new dedicated server with an AMD FX-8350 CPU, and installed VMware ESXi (now called vSphere) onto it, which is a bare-metal hypervisor, and ran my separate services as virtual machines from that. There is a free version of VMware vSphere still available with some limitations.
Migration Rationale
As I grew my homelab to multiple servers, and wanted to test out clustering and high availability, I found the licensing cost for other VMware products quite expensive for home use. Fortunately, there is a VMWare User Group (VMUG) Advantage membership which includes evaluation licenses for most VMware products, and I was happy to use those in my homelab for a few years to try out things like vCenter and try to set up Kubernetes on VMware Tanzu (which did not go well).
The three main reasons I decided to migrate off of VMware were the ongoing costs of closed-source software, the increasing hardware compatibility requirements, and the upcoming Broadcom acquisition.
I am a big supporter of open source software, and I don’t like vendor lock-in. While I was supporting and using VMware products at work, it made sense to stay familiar with the software, but as I’ve moved more towards cloud and platform-agnostic development, I interacted with VMware products less and less. I also was finding less value from paying the annual cost of the VMUG Advantage license, although I did enjoy some of the online meetings.
Starting with vSphere 7.0.3, VMware started removing official support for older hardware, including the Intel Sandy Bridge and Ivy Bridge CPUs, which most of my servers are still based on, with Xeon E5-26XX type processors. With vSphere 8, the installer will prevent you from installing or upgrading, although there is a workaround requiring setting a kernel option. Still, it made sense to move to a platform which would have support for older hardware, as I didnt’ know when it would become impossible to upgrade.
The announcement of Broadcom looking to acquire VMware was another reason I decided to start looking at migrating. Broadcom has a history of behavior with other acquisitions like Symantec, and from the news, the playbook with VMware sounded consistent. This is still in progress, and there are a lot of unknowns, but there was a lot of news and discussion on how Broadcom would prioritize their top customers and ignore the rest; and how resources would be allocated to maximize profit, at the expense of software updates and quality.
The impetus for migrating was the purchase of another server for my homelab – a used Dell PowerEdge R640. This would give me the ability to set up a cluster of 3 compute nodes, so I had to decide whether to double down and lock in with VMware solutions, or look at other options.
Choosing Proxmox
I strongly considered setting up OpenStack at home as an open source cloud platform, as it had better Docker container support than Proxmox (which natively supports LXC), but I decided against this due to the complexity of learning the platform. I have enough learning in my roadmap to do, without adding the time and effort of tweaking and configuring all of the OpenStack services at home. If I do end up needing to support and work with OpenStack, I can always reconsider, or set up an OpenStack “DevStack” environment to play with.
I decided to go with Proxmox as the virtualization platform because it is a robust, free, open-source project. It has support for a number of features I want to use such as ZFS file system support, Ceph storage clusters, clustering with high availability, and more. With 3 similar servers with a decent amount of resources, I should be able to make good use of these features.
Backing up VMware Virtual Machines
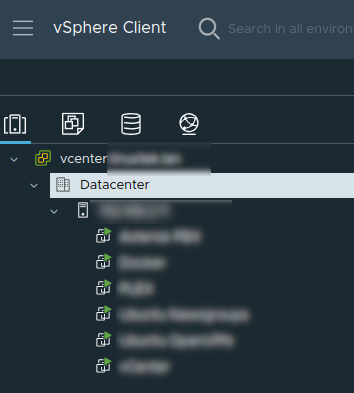
The first thing I needed to do was take a full backup of all of my virtual machines on VMware. I manually exported each of them in vCenter by right clicking on it and going to Actions > Template > Export OVF Template. This downloaded the entire virtual machine into a couple of files – mainly an ovf with a definition of the virtual machine settings, and a vmdk file with the OS drive, which were quite large. To avoid filling up my workstation disk, I saved these files to a share on my TrueNAS SCALE server.
Installing Proxmox
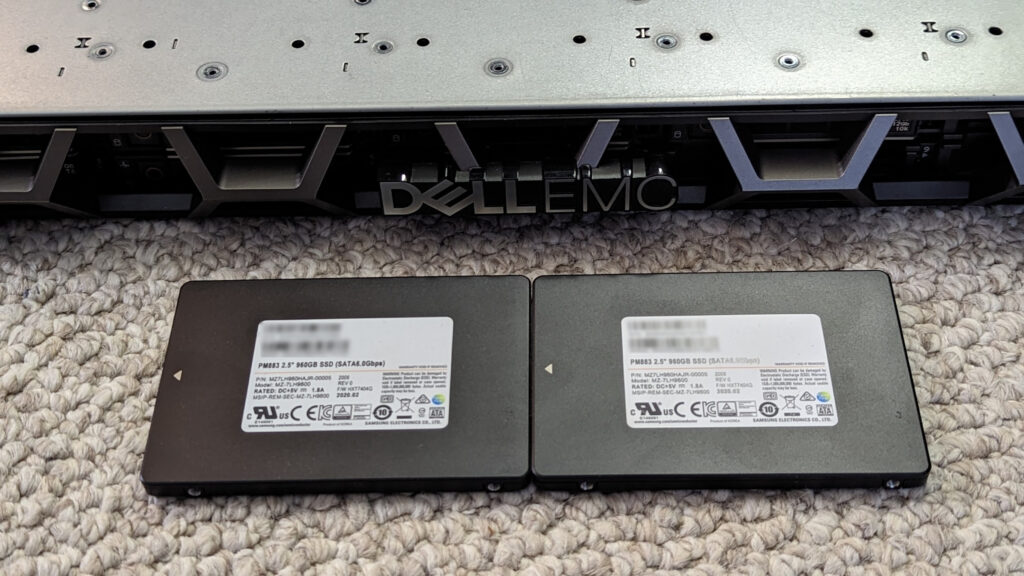
As I had the new Dell PowerEdge R640 server, I updated the BIOS, firmware, and set the RAID controller to HBA Mode, as I planned to mirror the OS drive for Proxmox using ZFS. I used a pair of 960GB SATA SSDs for the OS install:
I won’t go through the details of the Proxmox install, but it was very straightforward. I downloaded the latest ISO and wrote it to a USB stick, booted the server off it, and ran the install, choosing to set up a RAID1 Mirror using both drives. Once it was set up, I was able to access the web interface over https://ipaddress:8006.
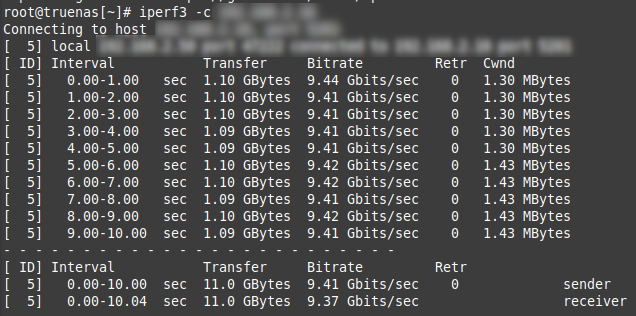
I made sure I had the network interface and vmbr0 bridge set up properly to use my 10Gbps NIC, and ran a quick test using iperf3 to test the network connection between servers:
Converting and Importing Virtual Machines
Once the network was stable, I copied over all of the VM backups to the Proxmox server from my NAS using SCP. One tip is that if you are using a file path with SCP using spaces, you’ll need to put three slashes to escape the space. For example:
scp -rv [email protected]:/mnt/storage1/NAS/Other/VM\\\ Backups/01152023 ./To bring up the virtual machines on Proxmox, I did the following:
Created a new virtual machine on Proxmox with the specifications I wanted. This can be done by right clicking the Proxmox node, and choosing Create VM to start the wizard. I could have used the qm importovf command to create the VM using the parameters from the OVF file exported, but in my case, I wanted to adjust the CPU and memory specifications, so I didn’t bother with this command. As part of creating the virtual machine, you create a disk for the OS. I left the default for the disk, as it will be removed shortly.
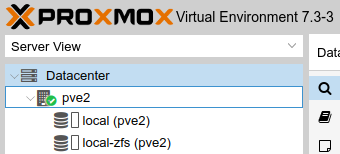
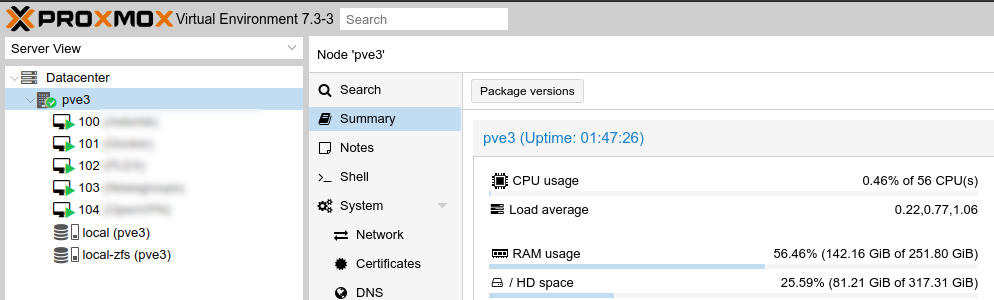
Take note of the VM ID assigned to the newly created VM, and also the name of the local storage the VM will be running on. Because I am using ZFS, mine is called local-zfs:
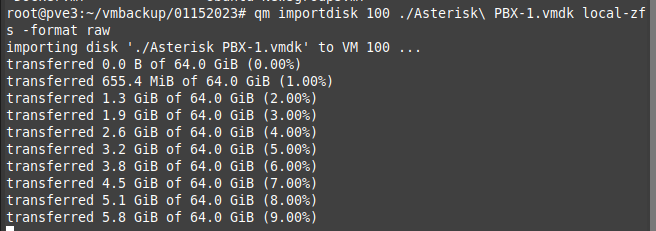
In an SSH session on the Proxmox server, I ran the following to import the OS disk from the vmdk file to the virtual machine:
qm importdisk <VM ID> ./path/to/DiskFile.vmdk <storage> --format rawThis takes a few minutes to run and convert the disk to be usable by Proxmox:
This adds the OS disk to the virtual machines as an unused disk. In my case, I had to go to the VM > Hardware > Hard Disk, edit the disk, and switch the type to SATA. I then detached and removed (and deleted) the default SCSI OS disk, and attached the SATA disk as the default.
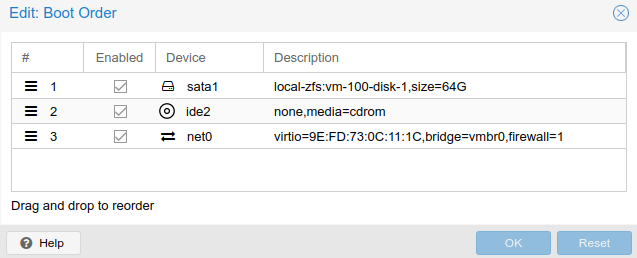
In VM > Options > Boot Order, I enabled the disk, and switched the boot priority so it would boot first:
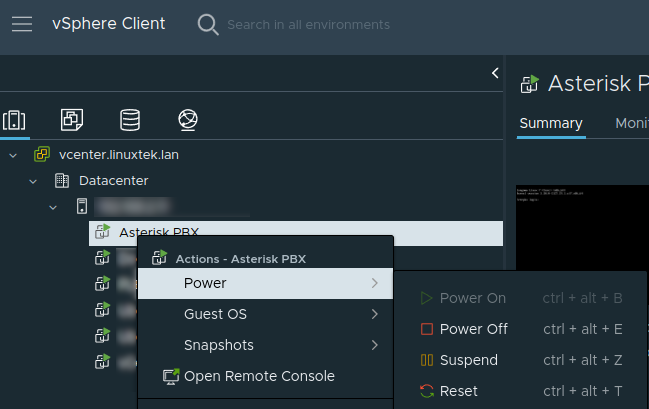
Once all the configuration changes were made, I shut down the virtual machine on VMware, and started it up on Proxmox:
In my case, the disk booted and the virtual machine came up on Proxmox without issue. The only configuration change I had to make was to adjust and bring up the network interface, as in some cases, the interface name had changed.
I checked the name of the interface using the ip addr command. In most cases, it had been changed to ens18.
I would either have to update the interface name in /etc/network/interfaces, or if referenced, in /etc/netplan/50-cloud-init.yaml.
After doing an ifup/ifdown <interface> or netplan apply, I could confirm with ip addr or ifconfig that the the VM was on the network. If I had any network shares, I remounted them all using mount -a and made sure the shared were mounted properly.
I then repeated these steps for each virtual machine, bringing them down on VMware and up on Proxmox, until they were all migrated:
Conclusion and Next Steps
Migrating virtual machines from VMware to Proxmox was easier than I expected. I’m glad there are tools to convert the disks, and the documentation is plentiful.
Once I had fully migrated all the virtual machines to Proxmox and tested to make sure they were all working, I shut down the VMware server and went through the same steps to update it, set the RAID controller to HBA Mode, and installed Proxmox on it. Now that I have three nodes, the next steps and some future project ideas are:
- Set up network storage points to TrueNAS on each server.
- Ensure all servers have the same networks set up – the main server network, and DMZ at least.
- Schedule automated VM backups to TrueNAS.
- Set up clustering for the three Proxmox servers.
- Set up the Proxmox cluster with high availability to allow for automatic VM failover.
- Set up shared network storage using Ceph to make the Proxmox cluster hyper-converged.

Resources
- VMWare vSphere Documentation – Export an OVF Template
- Proxmox Documentation – Migration of servers to Proxmox VE
- Proxmox Documentation – QM – Qemu/KVM Virtual Machine Manager
- Edywerder – VMWare to Proxmox
![]()