Introduction
As part of the Free AWS Cloud Project Bootcamp, we are using Gitpod as our Cloud Developer Environment (CDE). This has a number of advantages such as ensuring we all have consistent environments, eliminating the need to troubleshoot local environments. There are also a number of features in Gitpod which we can take advanage of.
While the audience for this article is primarily the bootcamp participants, it can be helpful to anyone who is interested in a CDE. This article will go a bit deeper into some of the features of Gitpod, as well as some recommendations for setting up your environment. It will also cover some common issues students have run into, and how to fix them.
Recommended Viewing

As part of preparation for this article, I went through Andrew Brown’s ExamPro Cloud Developer Environment (Gitpod) course which can be found on the Exampro.co website in chapters, as well as the FreeCodeCamp YouTube channel. If you have a few extra hours and really want to get more familiar with Gitpod, I would highly recommend this resource. Additional helpful links are available in the Resources section at the bottom of the article.
What Is Gitpod?
From the Gitpod Github README:
Gitpod is an open-source Kubernetes application for ready-to-code cloud development environments that spins up fresh, automated dev environments for each task, in the cloud, in seconds. It enables you to describe your dev environment as code and start instant, remote and cloud development environments directly from your browser or your Desktop IDE.
Gitpod is a Cloud Developer Environment, which is a consistently reproducible, instant, ephemeral, and disposable development environment. Rather than having to set up a local environment for each task, or having conflicts in dependencies between projects, you can quickly customize and spin up a development environment for individual projects or repositories. This is automated through various code options, to make building the environment easy and repeatable.
Features of Gitpod
Gitpod values the following principles as a Cloud Development Environment:

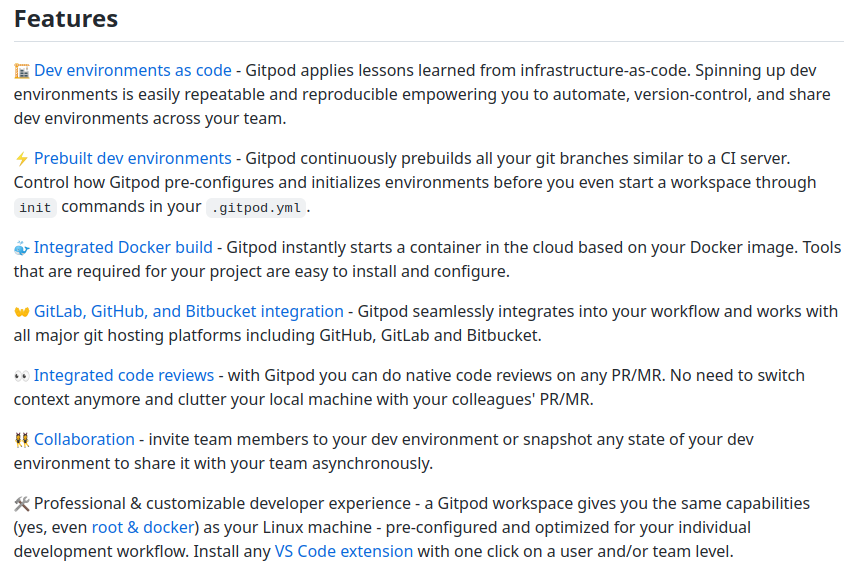
Some of the features of Gitpod are described here on their Github page:
Getting Started
Gitpod supports a number of Git providers, such as Github, Gitlab, and Bitbucket; as well as a number of browsers, IDEs, and editors. For this article I will be focusing on using Github, Chrome Browser, and VS Code Browser.
First, you’ll need a Github repository. I created a new one for testing a new environment, and to provide some sample config files.
I would then recommend signing into the Gitpod.io website using your Github account credentials. You will be prompted for some integration permissions. You can manage these permissions in the User Settings > Integrations section. Be sure that Gitpod has proper access to your Github account, as it will use OAuth to manage pushing updates to your repository. You can check the Authorized OAuth Apps in Github under Profile > Settings > Integrations > Applications > Authorized OAuth Apps.
Next, I would recommend installing the browser extension for Gitpod, which works in either Chrome (also works in Edge, Brave and other Chromium based browsers), or Firefox. This will add a Gitpod button when browsing your codebase to make it easy to launch a workspace:

The button basically prepends https://gitpod.io/# to the URL of your repository, which is how it knows which repository to launch a workspace for, and then launches it in a new browser tab.
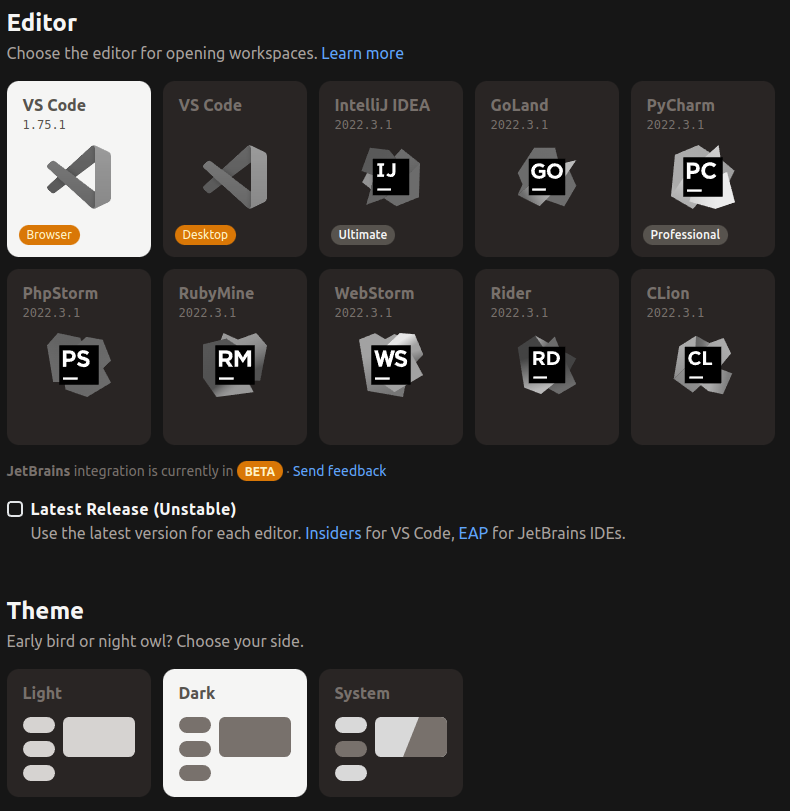
As part of setup, you’ll also be asked to choose your development environment. By default, VS Code Browser is used, but you can use other editors. You can change your editor preferences under User Profile > User Settings > Preferences. I would recommend doing this and setting Editor to VS Code Browser, and the Theme to Dark ahead of time:
Once this is done, you can go to your Github repository page, choose the branch you want, and click the Gitpod button to launch the workspace.
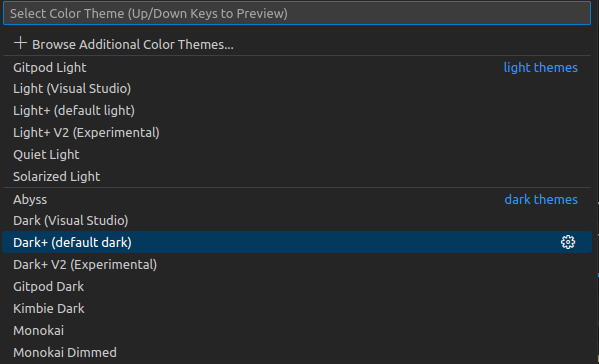
If you do launch VS Code and need to change the theme, you can do this by going to the Gear at the bottom left > Themes > Color Themes and choosing a light or dark theme from the list (I prefer Dark+):
Environment Variables
If you have variables that need to be set in your terminal for your code to run, you can set these by exporting an environment variable. For example:
export AWS_DEFAULT_REGION="us-east-1"To avoid having to do this every time you launch a workspace, you can store the environment variables in Gitpod. This can be done in the GUI by going to Profile > User Settings > Variables and clicking Add Variables. Alternatively, you can use the gp env command to set the environment variable in terminal. For example:
gp env SECRET_PASSWORD=abcdef123456You can confirm the variable is stored in Gitpod using the above link, and you can edit it to ensure the proper value:
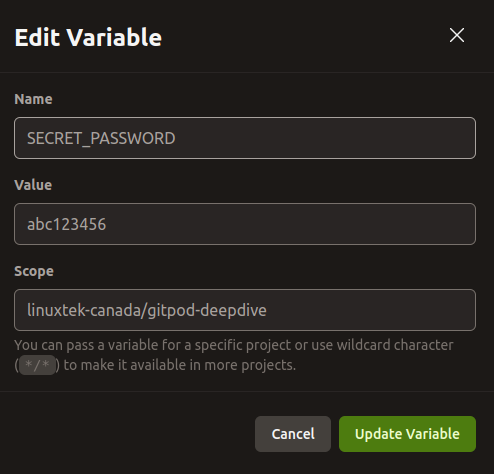
Once you relaunch your workspace, the variable will automatically be available as an environment variable:

If you have sensitive information like AWS credentials, passwords, or other secrets, you can store these in Gitpod so you don’t have to reference them directly in your code, or risk accidentally committing them to your repository. This is fine in a development environment for testing, but in production you may want to consider using a solution like Hashicorp Vault, AWS Secrets Manager, or 1Password for centrally managing these sensitive credentials.
There are a lot of other options for environment variables – they don’t all have to be declared globally. You can set them in Task terminal specific sections of your .gitpod.yml file, so they can be used for running those tasks only. More on Tasks later.
There is also a way to define Project-specific environment variables in Project settings, for use with prebuilds needing to access restricted services. More on Prebuilds later.
Bootcampers: For our project, you will want to set up the following variables to enable your access to AWS and refer to later:
- AWS_ACCESS_KEY_ID
- AWS_ACCOUNT_ID
- AWS_DEFAULT_REGION
- AWS_SECRET_ACCESS_KEY
Configuring Your Workspace
One of the advantages of using Gitpod is to automate tasks that would normally have to be repeated whenever you spin up your environment. The .gitpod.yml file at the root of your project is where you tell Gitpod how to prepare & build your project, start development servers and configure continuous prebuilds (we’ll get into this later) for GitHub. There is an introduction to .gitpod.yml available here.
The .gitpod.yml file is written in YAML syntax, which is easily readable, however keep in mind the indentation and formatting is very specific. You may want to check your file with a validator like YAML Lint to make sure it is correct before committing your code. This page provides some information on the different ways to handle multiple lines (for example using > vs a | character).
Introduction to Tasks
The basic setup of the file uses tasks to open separate terminal windows and run a series of commands. There are three stages to tasks:
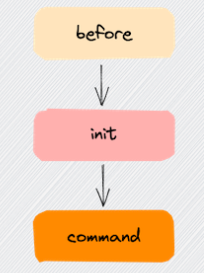
- before: Use this for tasks that need to run before init and before command stages. For example, customize the terminal or install global project dependencies. These commands are expected to terminate upon completion.
- init: Use this for heavy-lifting tasks such as downloading dependencies or compiling source code. These commands are expected to terminate upon completion.
- command: Use this to start your database or development server. These commands can continue to run after executing, so they are good for long running tasks.
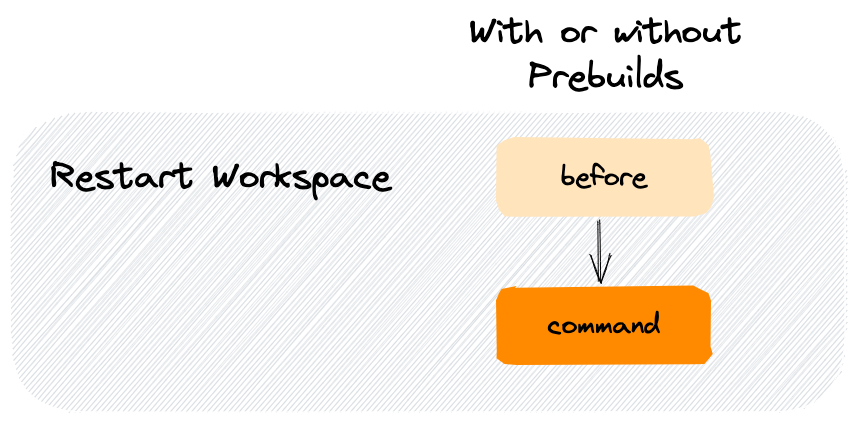
It’s important to highlight that these commands are run in sequence whenever a new Workspace environment is started up, however when an existing workspace is restarted, the init step is not re-run. Gitpod will only execute the before and command tasks:
As an example, if we want to use npm to install npx, and then use that to launch an http-server webserver, we could set up our .gitpod.yml this way:
tasks:
- name: Install and run http-webserver using NPM
init: |
npm install -y npx
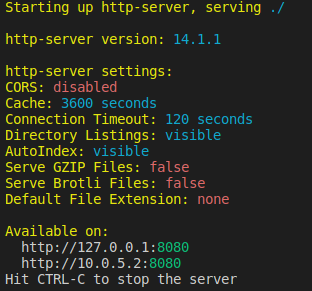
command: |
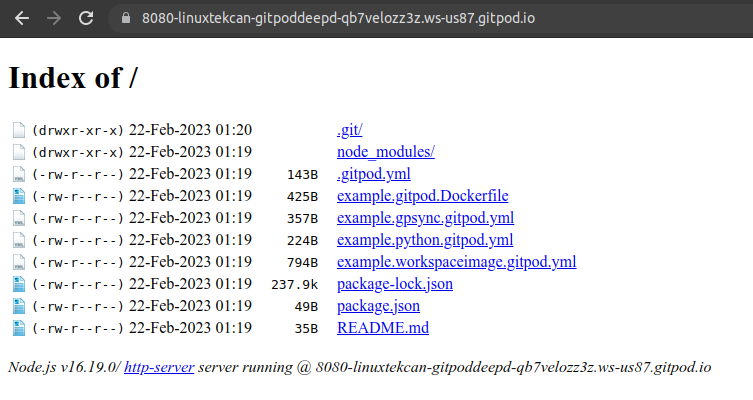
npx --yes http-serverWe can see in the terminal that launches that the http-server is installed and starts up:
And by clicking on the Ports tab, we can unlock the port, copy the local URL, and launch it in a browser successfully:
There are two important things to keep in mind about using Tasks this way:
- The before and command stages will be run every time the workspace is started. If it is stopped and restarted, the init stage commands will not be re-run.
- Any file changes made outside of the /workspace folder from init tasks will be lost on workspace start, when prebuilds are enabled (more on these later). This is one reason it isn’t recommended to run commands that make global changes to the workspace, like installing applications using apt.
Setting Task Order
Another thing to keep in mind that each task block runs independently in separate terminals. They can launch at the same time and there is no guarantee on the order they will run or complete. If you have tasks which have dependencies on each other to finish, there are a number of Gitpod commands that can be used to specify this.
gp sync-await can set a task up to wait until you call gp sync-done to notify that another task is complete.
For example, if we wanted to spin up an http-server webserver and initialize a database client, but make sure the database client initialized first, we could set up the .gitpod.yml file like this:
tasks:
- name: Install npx and database
before: |
npm install -y npx
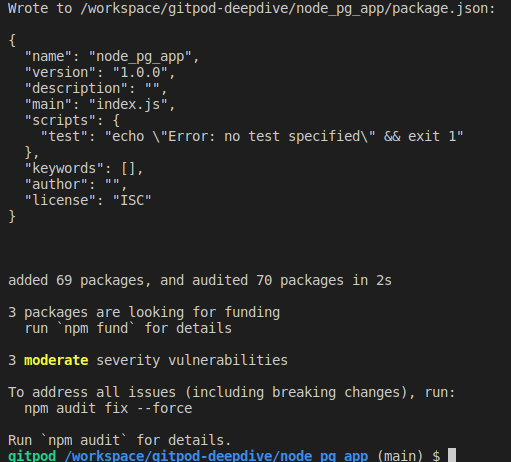
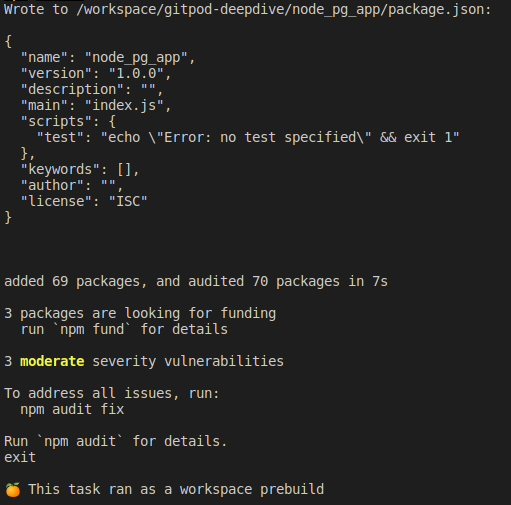
init: |
mkdir $THEIA_WORKSPACE_ROOT/node_pg_app
cd $THEIA_WORKSPACE_ROOT/node_pg_app
npm init -y
npm install -y pg pgtools
gp sync-done dbinstall
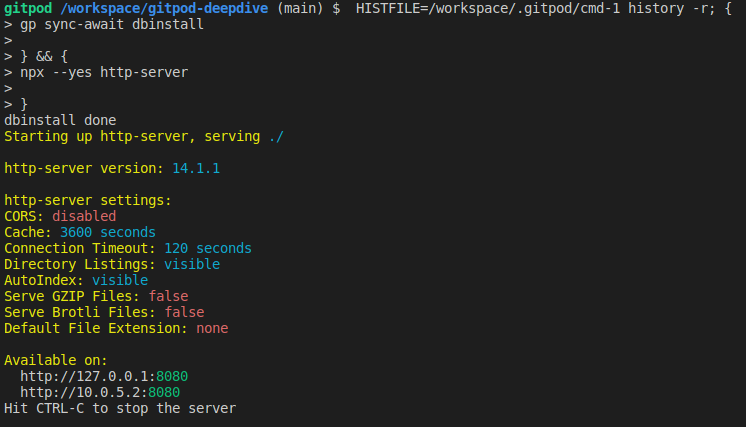
- name: Install http-server
init: |
gp sync-await dbinstall
command: |
npx --yes http-serverFrom launching a new workspace with this setup, we can see that the database client gets set up first:
And once this complete, in the other terminal window, we can see the http-server get installed and start:
Prebuilds
One issue with using Tasks in this way, is that all of the stages will need to run every time a new workspace is started. This can be very time consuming, especially if there is lots of steps to complete. The more you add into the .gitpod.yml file, the longer you will need to wait for everything to install when you spin up a new workspace. This is where one of the other great features of Gitpod comes in: Prebuilds.
Prebuilds reduce wait time, by installing dependencies or running builds before you start a new workspace. Prebuilds will run the before and init stages of your .gitpod.yml ahead of time, but not execute the command stage until the workspace is started. Note that all prebuilds require a Gitpod Project for the repository. To add a new project, follow the steps in this link. You can see your existing Projects on the Gitpod page under the Projects section.
Once the project is created, for Github, there is a section you can add to the .gitpod.yml to control options for when prebuilds run:
github:
prebuilds:
# enable for the default branch (defaults to true)
master: true
# enable for all branches in this repo (defaults to false)
branches: false
# enable for pull requests coming from this repo (defaults to true)
pullRequests: true
# enable for pull requests coming from forks (defaults to false)
pullRequestsFromForks: false
# add a check to pull requests (defaults to true)
addCheck: true
# add a "Review in Gitpod" button as a comment to pull requests (defaults to false)
addComment: false
# add a "Review in Gitpod" button to the pull request's description (defaults to false)
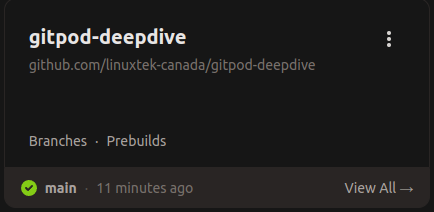
addBadge: falseFor example, once I committed and pushed this code as my .gitpod.yml, Gitpod automatically kicked off a prebuild. You can view the progress of the prebuild here under Projects > Project Name > Prebuilds.
Once it completed and showed as READY, I clicked on the prebuild, and I could see that it was completed. You can view the prebuild log from here, and it even gives a nice message to tell you how much time you’ve saved:

Once the workspace loaded, I could see all of the init stage commands had already been run, without having to wait for anything to install, and it even adds a line so you know it was run as part of a prebuild:
One important thing to note is that Prebuilds only save the contents of the workspace directory, so it’s great for spinning up local changes or commands that take effect in your dev environment local directory, however it isn’t ideal for global changes to the environment like installing modules and dependencies. For that, see the next section on Gitpod Custom Workspaces and Dockerfiles.
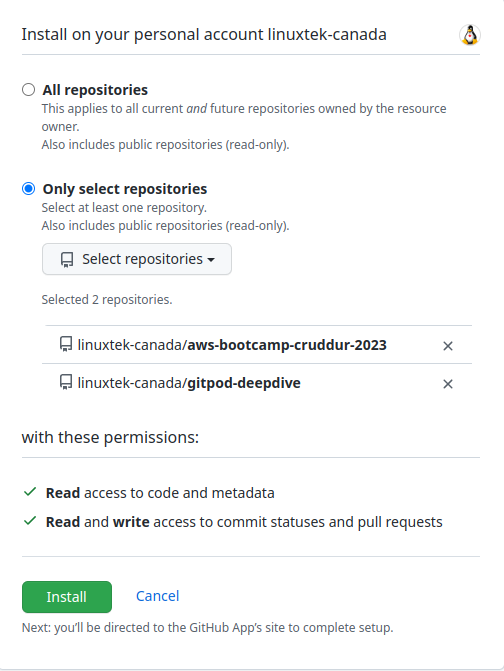
Bootcampers: For our dev environment, I went to Gitpod > Projects > New Project. When prompted, I gave additional authorization for Gitpod to watch the repository aws-bootcamp-cruddur-2023 to trigger prebuilds:
For setting up tasks in the .gitpod.yml, you’ll want to use prebuild to run commands to prep the container environment, such as npm i. The AWS CLI install works as an init step in .gitpod.yml because it installs to the /workspace folder, so that can also be kept as part of a prebuild.
Creating a Custom Workspace Image
From the documentation:
Workspace directory only
Prebuilds save only the workspace directory. Other directories like the home directory are not saved by prebuilds.
To use global installs like ‘npm install -g’, we suggest using a custom Dockerfile or a before task, which runs before the init task, and runs again before the command task.
For a lot of tasks like an environment wide update or install using apt, adding tasks in the .gitpod.yml to prebuild isn’t the right way to set this up. Instead you’ll want to create a custom workspace image.
By default, Gitpod uses a standard Docker image called Workspace-Full, which preinstalls a number of packages that are helpful for a development environment. If we need to go even further beyond this, we can build a custom Docker image for our workspace to start. You can start with one of the maintained Gitpod workspace images, or use a public Docker image.
This means if you’re working on Docker projects inside of Gitpod, you’re actually using Docker inside of Docker (Xzibit would be proud).
To build a custom workspace image, create a .gitpod.Dockerfile file, and set it up using the common syntax you would use for building a Dockerfile. For example if we wanted to install AWS CLI, Python 3.11, and refresh all packages, we could do:
FROM gitpod/workspace-full:latest

RUN cd /workspace \
    && curl "https://awscli.amazonaws.com/awscli-exe-linux-x86_64.zip" -o "awscliv2.zip" \
    && unzip awscliv2.zip \
    && sudo /workspace/aws/install

RUN sudo apt update \
    && sudo apt install -y apt-utils --no-install-recommends apt-utils \
    && sudo add-apt-repository ppa:deadsnakes/ppa -y \
    && sudo apt update \
    && sudo apt install -y python3.11 \
In the above code, we combine the commands into one RUN command to avoid creating multiple layers. This is a Dockerfile best practice.
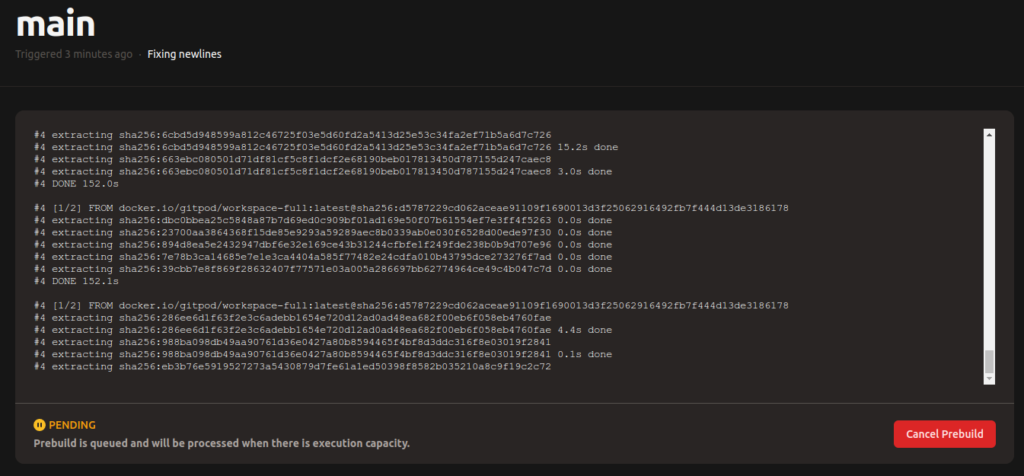
In our .gitpod.yml we just need to reference this .gitpod.Dockerfile by adding the following:
image:
  file: .gitpod.Dockerfile
After kicking off a prebuild, we can see the image being built, downloading and extracting the Docker layers, then installing all of the modules.
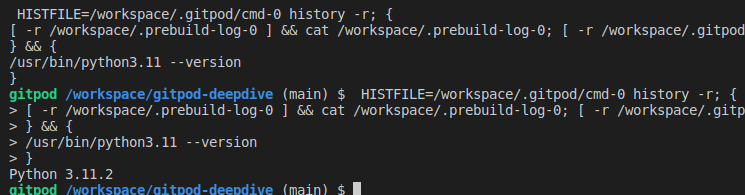
When starting a new workspace based on this prebuild, it will take a bit longer the first time to build the image and set up the workspace, but all of the installs should already be run. After the terminal kicks off the command stage, I can see that Python 3.11 is already installed:
Billing Best Practices
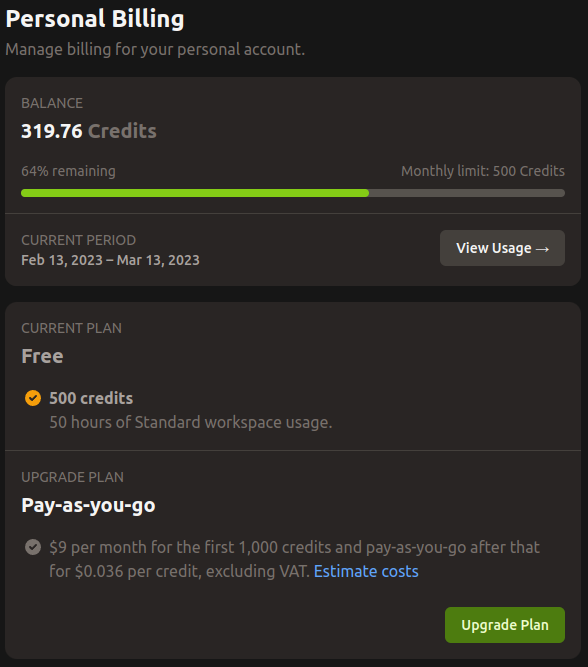
Gitpod provides a generous free tier for individuals of 500 credits/month or up to 50 hours. More powerful workspace classes are available if you need more compute and memory, however they come at the cost of additional credits. Standard workspaces use 10 credits per hour, whereas Large workspaces use 20 credits per hour. Prebuild processing is currently billed with the same workspace class as regular workspaces.
By default, workspaces stop following 30 minutes without user input (e.g. keystrokes or terminal input commands). There is a paid feature to allow extending the workspace timeout up to a maximum of 24 hours. While running idle, these workspaces will burn credits, so a good practice is to stop them when you’re finished and ideally after you’ve pushed your code to repository.
Stopped workspaces are automatically deleted 14 days since the last workspace start.
Pinned workspaces are never deleted. You can pin a workspace from your workspace list in the Gitpod dashboard.
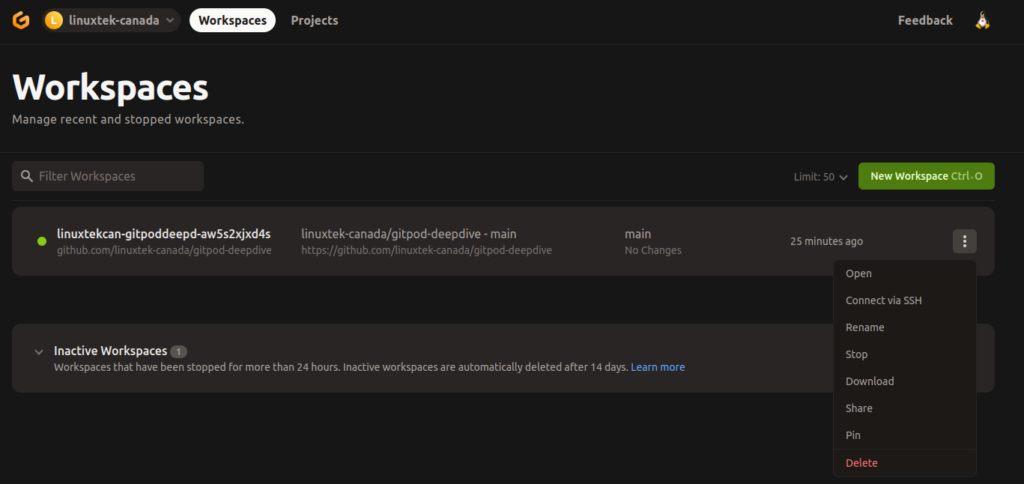
You can see all open workspaces on this page, and can click the 3 dots and select to either stop or delete a workspace. Note that if you delete a workspace, you will lose any progress that hasn’t been saved to your repository.
You can check your available credits at this link or under Profile > User Settings > Billing. This will show you the balance, the current period before the free credits reset, and any additional paid options you are subscribed to:
Bootcampers: Don’t forget to watch Chirag’s Week 1 Spending Considerations video, as he goes over a number of valuable points for multiple Cloud Developer Environments.
Troubleshooting – Unable to push to repo
One common issue in our bootcamp was many students being unable to push to their repository. If using the GUI, they would get this error:
You don't have permissions to push to "Github Username/Repository Name" on Github. Would you like to create a fork and push to it instead?
If using command line to push, they would see an error:
gitpod /workspace/gitpod-deepdive (main) $ git push origin main
remote: Permission to linuxtek-canada/gitpod-deepdive.git denied to linuxtek-canada.
fatal: unable to access 'https://github.com/linuxtek-canada/gitpod-deepdive.git/': The requested URL returned error: 403
In both cases, the real error and solution was actually shown in the bottom right corner of the screen:

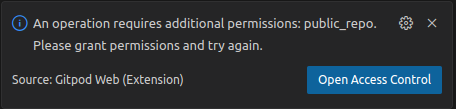
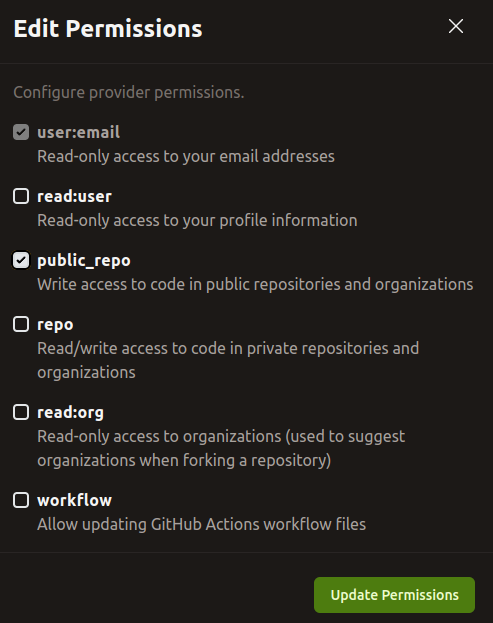
In order for Gitpod to push changes to your repository, it needs access to public_repo, since in the case of our Bootcamp project, the repository is public. If this wasn’t added when you authorized Gitpod access to Github, the integration setting can be changed in Gitpod Integrations under Profile > User Settings > Integrations, Clicking the 3 Dots > Edit Permissions, and checking public_repo:
Alternative Products
While Gitpod seems like a very good solution, there are other alternatives out there you can check out with various free tiers, such as Github Codespaces and AWS Cloud9. There are also options if you want to build a local development environment as code, such as using Hashicorp Vagrant with a VM solution like Virtualbox. I’ve previously written an article on using Vagrant that might be helpful in this case.
Conclusion

I honestly didn’t think I would like using Gitpod and would stubbornly cling to my local development environment using a local VS Code. But the idea of a cloud based development environment that you can work on from anywhere does have some appeal. And the more I used it, the more I could see where it would save me time. If you work in a local development environment, it’s worth checking out.
Resources
- ExamPro – ExamPro Cloud Developer Environment (Gitpod) Course
- YouTube – ExamPro Cloud Developer Environment Certification Video Course
- YAML Multiline Info
- Gitpod Screencast Videos
- Gitpod Documentation
- Gitpod Github Page
- Gitpod Discord
![]()
Hello Jason
I get error while launching gitpod green button from git hub
I click on anew workspaces option.
Then can not establish connection error comes.
Sounds like the integration with Github isn’t working properly. I would suggest asking for help in the Bootcamp Discord to troubleshoot.
Other thing may be if you’re set up to use local VS Code instead of Browser. The article has steps to reset that.
Good explanation. Thanks for sharing this. I had more confused about gitpod but this article is really helpful to understand