Background
I built my previous PC back in 2012. I had used a number of old laptops and a Pentium 4 machine for a while, while mostly gaming on PS3, but eventually I wanted to switch back to a desktop PC for gaming, and have some more resources for virtualization and applications. This was before I had a large homelab, and I really only had a dedicated ReadyNAS Pro Business with 6 drives for external storage.
This was the initial build:
- CPU – Intel Core i5 2500k – 4 cores / 4 threads @ 3.30Ghz
- Motherboard – ASRock Z68 Extreme4
- RAM – 16GB (2x8GB) DDR3 1333Mhz
- GPU – EVGA GeForce GTX 580
- Network – Intel 1GB NIC
- Disks – 2x WD Black 7200RPM 1TB Disk in RAID1 (Game Installs)
- Case – Corsair Obsidian 700D
- PSU – Corsair 850W Power Supply (partially modular)
- CPU Cooler – Corsair Hydro Series H100 Liquid CPU Cooler
- Windows 7 Professional OEM
Yes, I know this machine is pretty dusty, and the cable management kind of sucks. I did open it up and blow out the dust, and clean the air filters regularly, but I took this photo as I shut the machine down to take it apart, and cleaned all the parts individually. It’s an older style case, and doesn’t really have places to tuck away a lot of the extra cables. I had previously ziptied them to clean them up a bit, but had to remove those to install newer hardware. Also, the power supply is not modular, so I’m stuck with all of the unneeded cable connectors.
I stretched this machine for many years, and eventually switched back to running Linux exclusively. I made the following upgrades along the way:
- CPU – Intel Xeon CPU E3-1240 V2 – 4 cores / 8 threads @ 3.40Ghz (overclocked)
- RAM – 32GB (4x8GB) GSkill Ripjaws DDR3 1600Mhz
- GPU – MSI GeForce GTX 1070 8GB
- Network – Intel 82599ES 10Gbps SFP+ Network Card
- Disks – Samsung EVO 840 256GB (OS Drive)
By 2023, I had upgraded the displays, keyboard, mouse, and added some extra USB ports. I was running into bottlenecking on the 10Gbps NIC due to PCI-Express lane limitations. Many of the fans had failed, and most of the USB ports were not working, and I concluded the motherboard was halfway into the grave. I’d been using GeForce Now in a browser for cloud gaming for titles my PC couldn’t handle, or I couldn’t be bothered to try and get working with Lutris/Proton. But the pixellation and inconsistent framerate were getting so bad, I felt it was finally time for an upgrade.
New PC Requirements
For a new PC build, I spent a lot of time determining what I wanted. Some of the considerations:
- I wanted something enthusiast grade, but not absolute top of the line. I know that there are diminishing returns as you throw more money into the build, and I wanted to find a good sweet spot on value for performance.
- I don’t mind paying more for quality parts when it matters, especially if it means they’ll last longer, or have a better warranty.
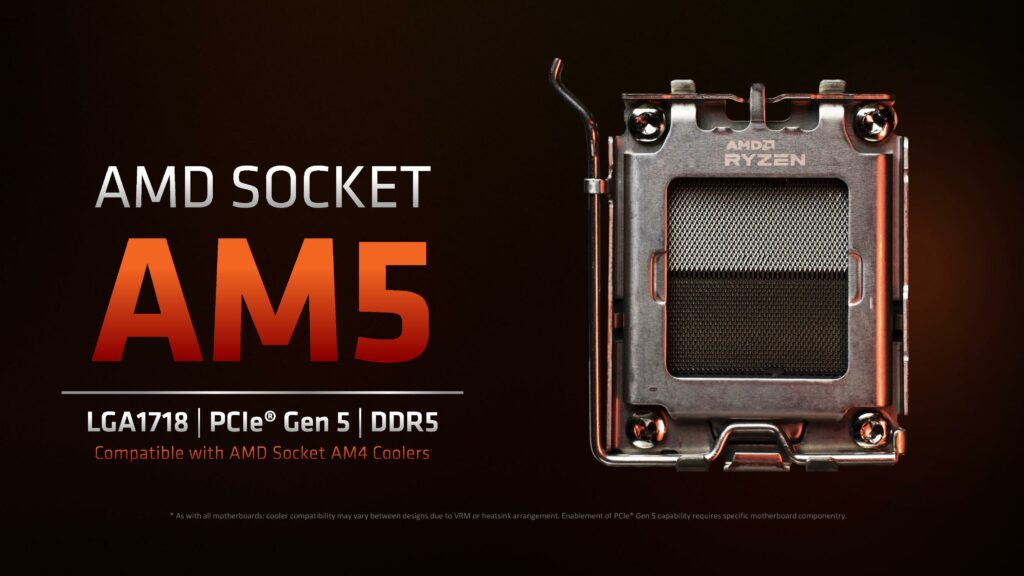
- That said, I did want to ensure I had some future upgrade room, as I managed to stretch the previous computer so long, and I don’t feel the need to upgrade every year. I wanted to start with a platform that had more than a few years lifespan, and I felt hopeful that the AMD AM5 platform would last a decent amount of time, considering how long AM4 lasted (2017 – 2024+).
- I don’t overclock unnecessarily, as I’d rather maximize component lifespan. I had overclocked the CPU on my previous build, but only after I started to notice limitations.
- I didn’t expect to be doing any gaming or productivity work at 4K or higher. I had a couple of 27″ LG monitors that were capable of 4K and I found things too small at that resolution. My gaming monitors were 3x LG Ultragear 27GL850-B, which ran 144hz at 1440p. I planned on reusing them, which meant I needed a GPU with 3 DisplayPort connections.
- I mainly needed the PC for gaming and development work. I could do my virtualization and testing on my homelab servers.
The PC Build
I ended up going with a full AMD system. I went back and forth on Nvidia GPUs, but I typically would play previous generation games, and didn’t really need ray tracing, so saving money there made sense. Since I was doing all of my work on Linux, having the AMD drivers build right into the kernel was a plus as well, and less of a headache to manage than manually upgrading binary drivers. After seeing some of the issues on the GeForce 4000 Series with the 12VHPWR cables melting, and some of the power adapters being recalled due to fire risks, I decided to avoid this generation.
I did a lot of research as I had previously seen this video from Gamers Nexus about voltage issues with Ryzen 7 CPUs and certain motherboards. I had been avoiding Asus products for a while now, and some of the more recent controversies reinforced that behavior. I had used MSI and Gigabyte products in the past and were fairly happy with the quality and support.
I bought most of the parts over Black Friday 2023 as things came on sale. I originally bought a Ryzen 7 7900X3D, but afterwards, I read a lot about the problems dealing with pinning processes onto the cores with the 3D-Vcache, and decided to return it, and managed to get a Ryzen 7 7800X3D at a very low price. I think the opening line from this video reinforced my decision:
This is what I ended up going with. This is the build on PCPartPicker:
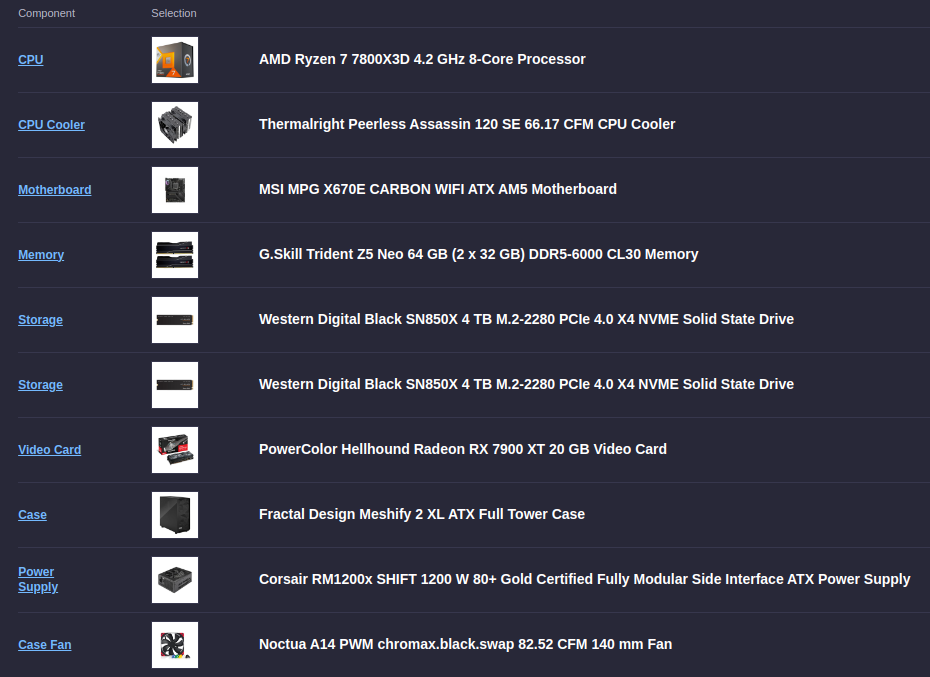
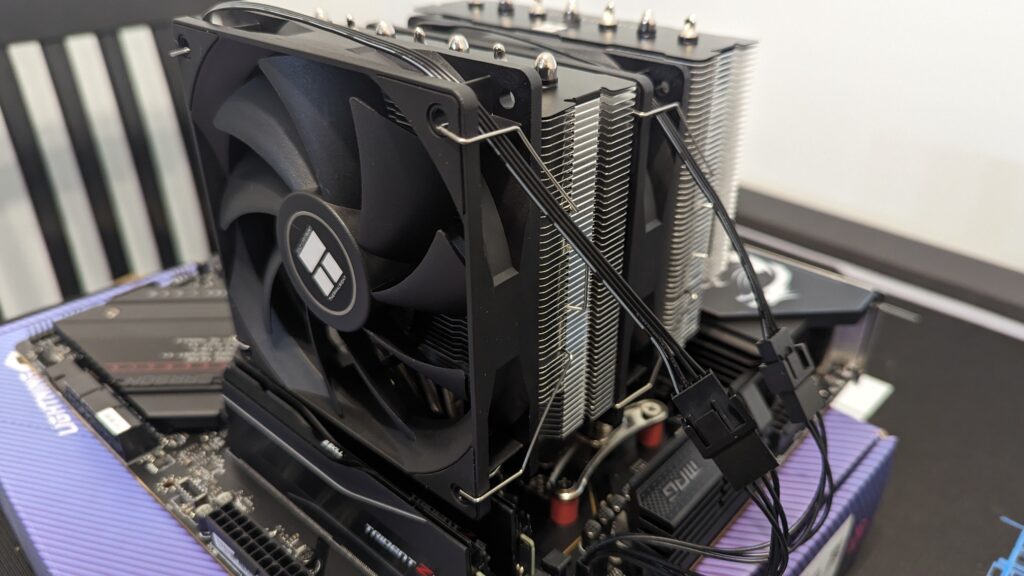
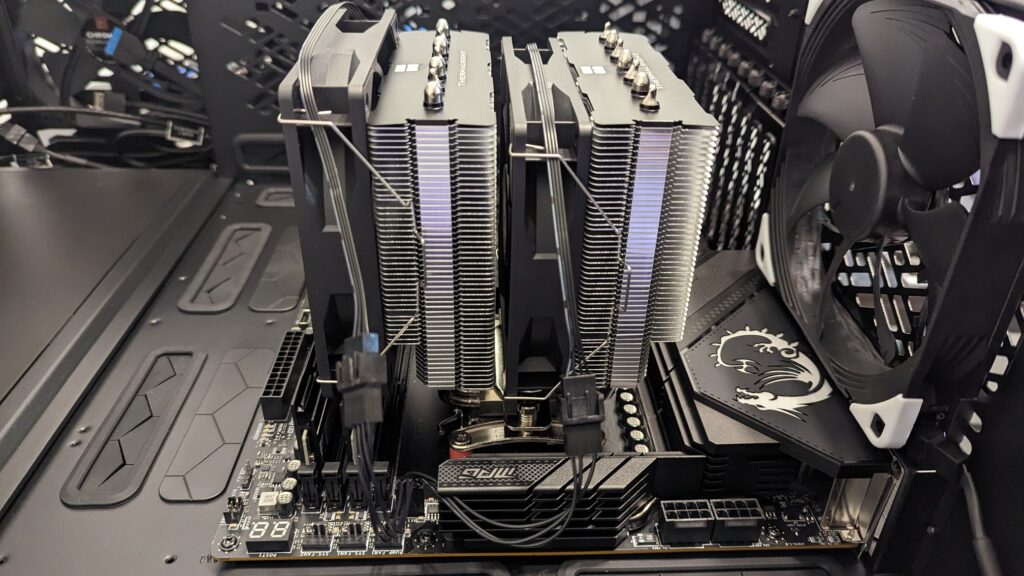
I went with a more value option for the CPU cooler, as the Thermalright Peerless Assassin 120SE had pretty high acclaim for its price to performance. I found many videos favouring it over more expensive coolers.
I probably would have gone with a Noctua cooler like the NH-D15 chromax.black, but they are still selling the same hardware designed from 2014, and a refresh is expected in a year or so.
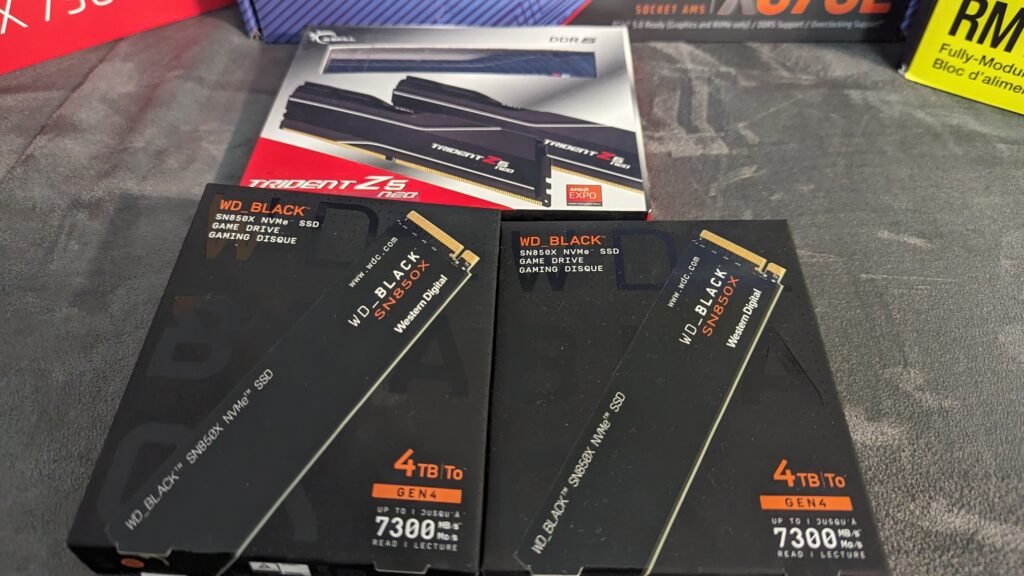
I picked up two 4TB PCI-E Gen4 NVME drives at a fairly good discount. I looked at PCI-E Gen5 drives, but the performance didn’t seem worth the significantly larger cost. I ended up putting the drives in a BTRFS RAID-0 to maximize storage, mainly for video game downloads. I’m not super happy with using BTRFS (I would have preferred ZFS), but it was too much trouble to try and get ZFS running for the boot drives on Fedora.
I added two older 2TB Samsung Evo 860 2.5″ SSDs in a BTRFS RAID-1 mirror as a “Scratch” drive, and I put my Github coding directory there.
I wouldn’t be storing anything sensitive on this PC, as I have multiple shares connected to my NAS, and all of my coding would be committed to Github.
I chose the Powercolor Hellhound 7900XT 20GB as a GPU, as I didn’t want to buy absolute top of the line, and the 7900XTX didn’t seem worth the extra cost. A lot of the reviews on the AMD 7000 series release was fairly lackluster, and the performance gains weren’t as impressive as what had initially been announced. I had seen this article about the 7900XT being decent value, but I knew as Nvidia was releasing a refresh to the 4000 series, AMD would probably be forced to drop prices in a few months. As of this article, the card is going for $959 CDN at Canada Computers, and that’s pretty close to what I paid during a price drop after Black Friday.
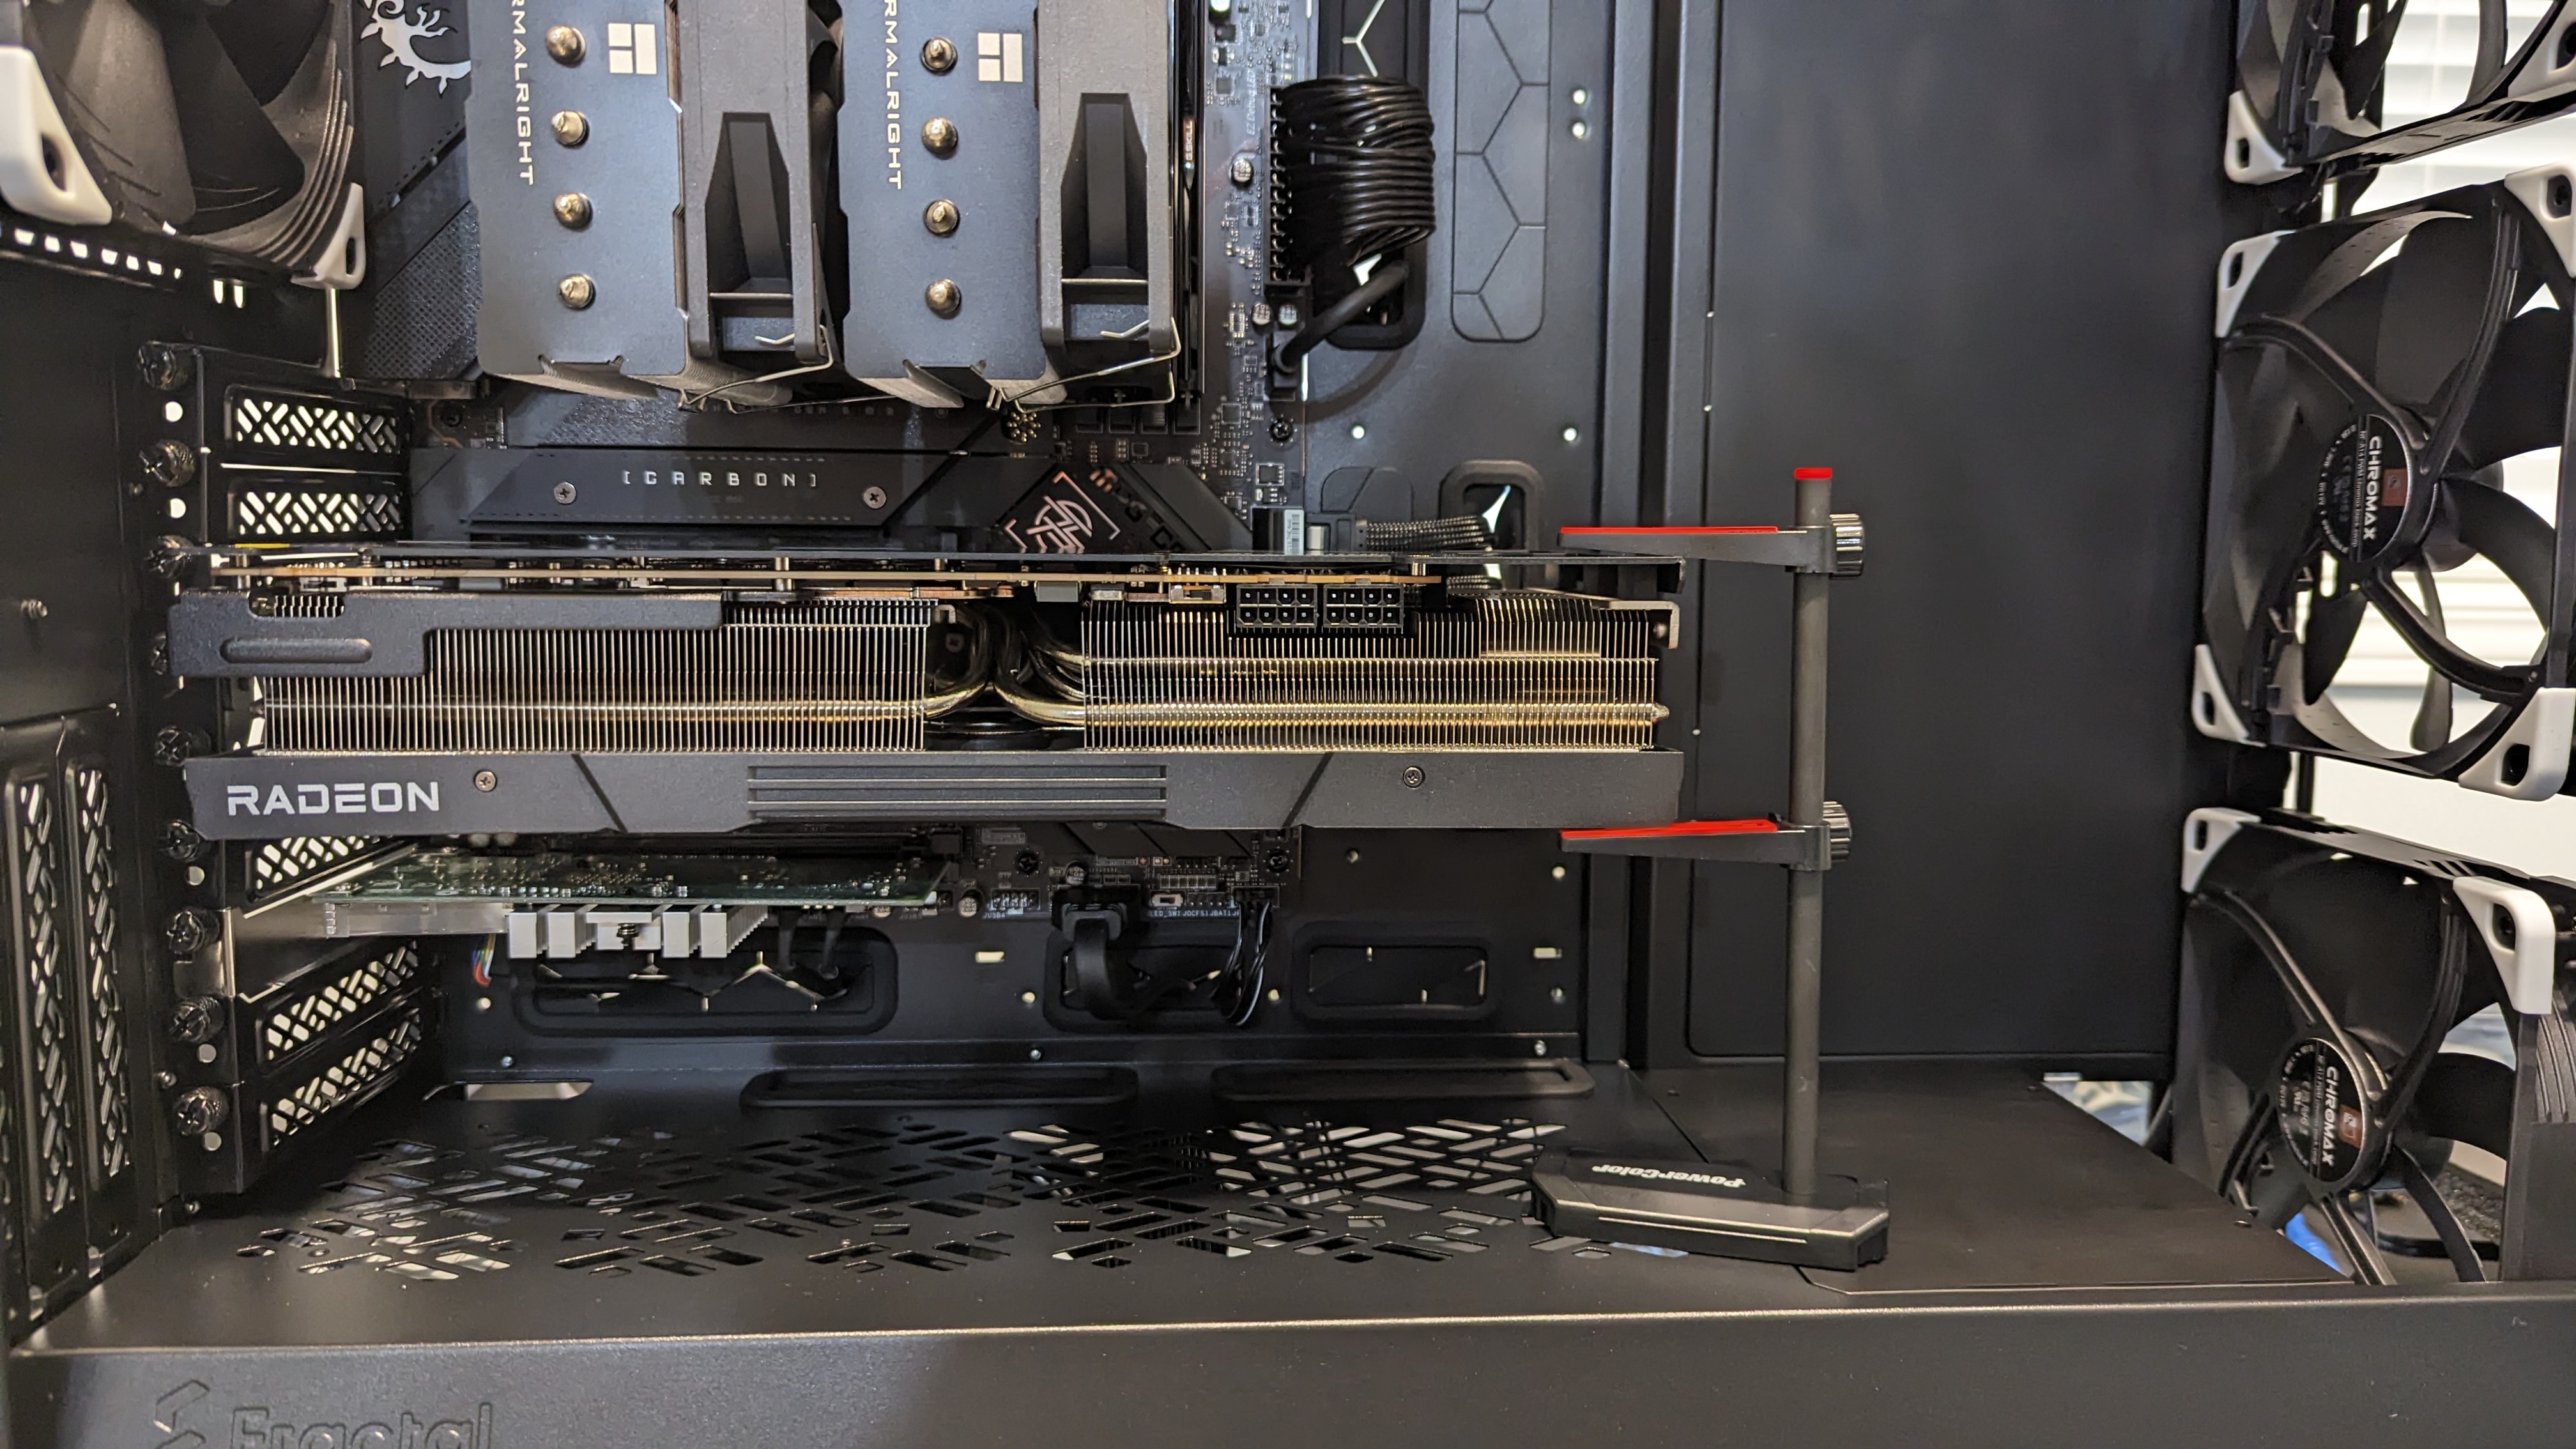
The video card came with a support pillar to help prevent GPU sag, but it was pretty bulky and didn’t look very nice. I ended up replacing it with an aluminium column style support pillar, which was more compact and better aesthetically:

Building The System
I had previously purchased a large Gamers Nexus Modmat, which was heavy duty rubber, and had the option for an anti-static grounding wrist strap. I set up on my kitchen table to give me lots of room to build. I started out by assembling the parts on the motherboard, including mounting the CPU cooler.
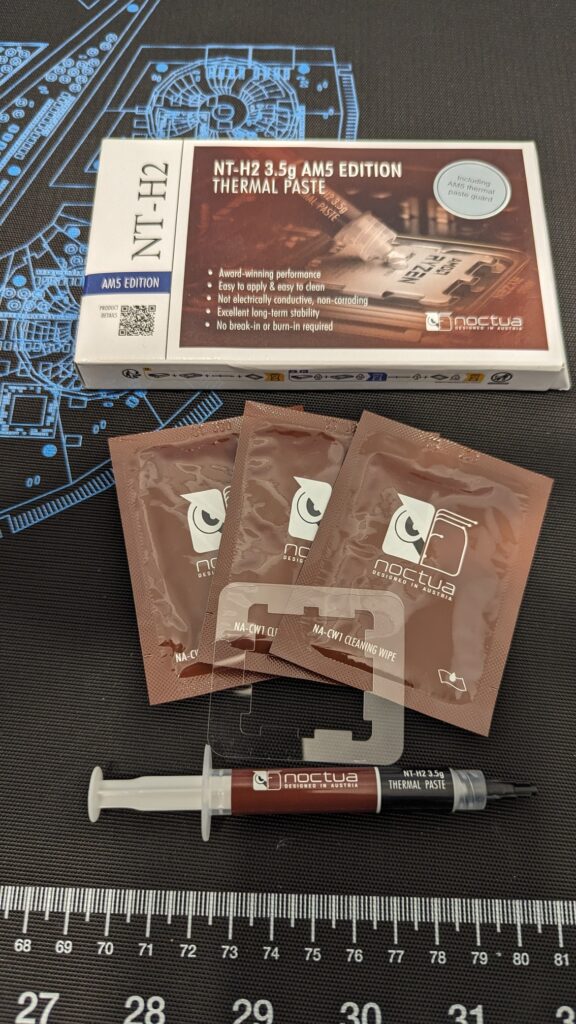
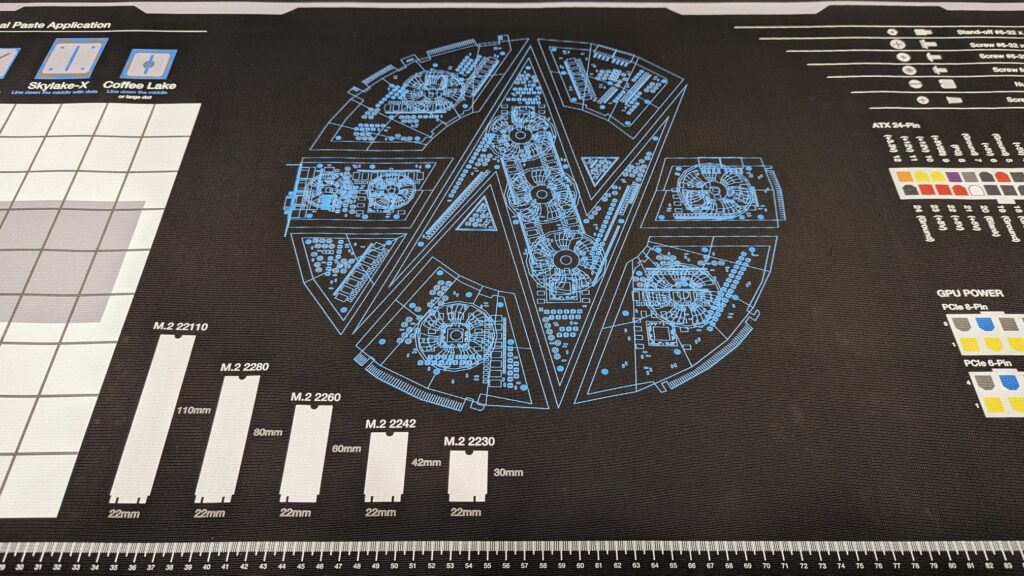
I had picked up a Noctua NT-H2 kit with thermal paste and a shield for keeping the paste from getting in the circuitry on the AM5 CPU. I had to raise up one of the CPU cooler fans slightly to make clearance room for one of the RAM sticks, but otherwise it was pretty straightforward.
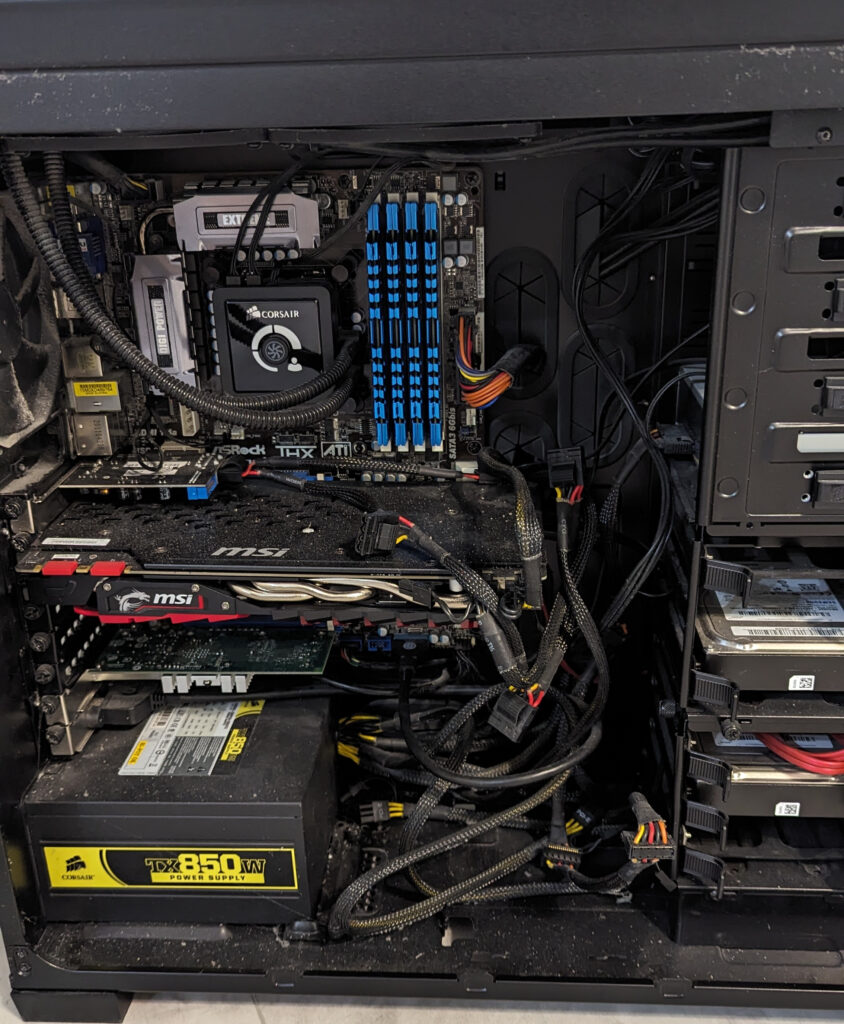
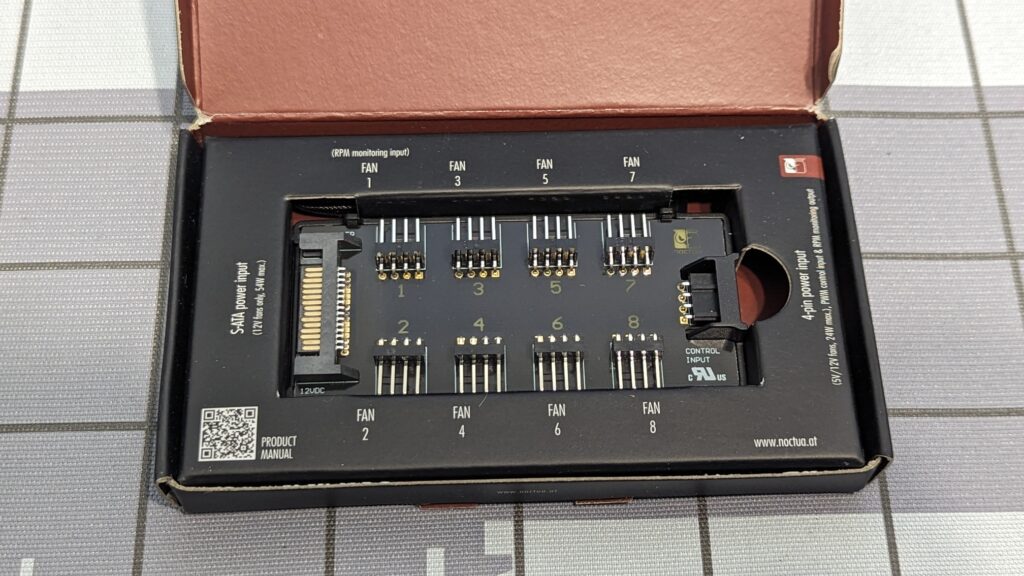
Once I had everything mounted on the board, I attached that to the case. I had replaced all of the included case fans with Noctua NF-A14 chromax.black.swap, but for the larger case I used, I needed to purchase 4-pin extension cables, and a fan hub to get everything to connect properly:
The fans were nice because they had silicone bumpers that would help reduce noise, and also had multiple color sets to choose from. I ended up going with a more neutral color, but the extra bumpers were definitely colorful!
I worked on the cable management for a bit, and the Meshify 2 XL had a lot of space in the back with velcro tie-offs to route all of the cabling. I thought about getting a fancy CableMods Cable Kit to make the power connections look nicer, but the power supply I selected required a fully custom cable kit, which was quite expensive and unnecessary other than for aesthetics.
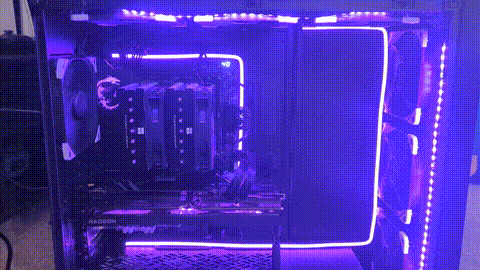
Adding Some Color
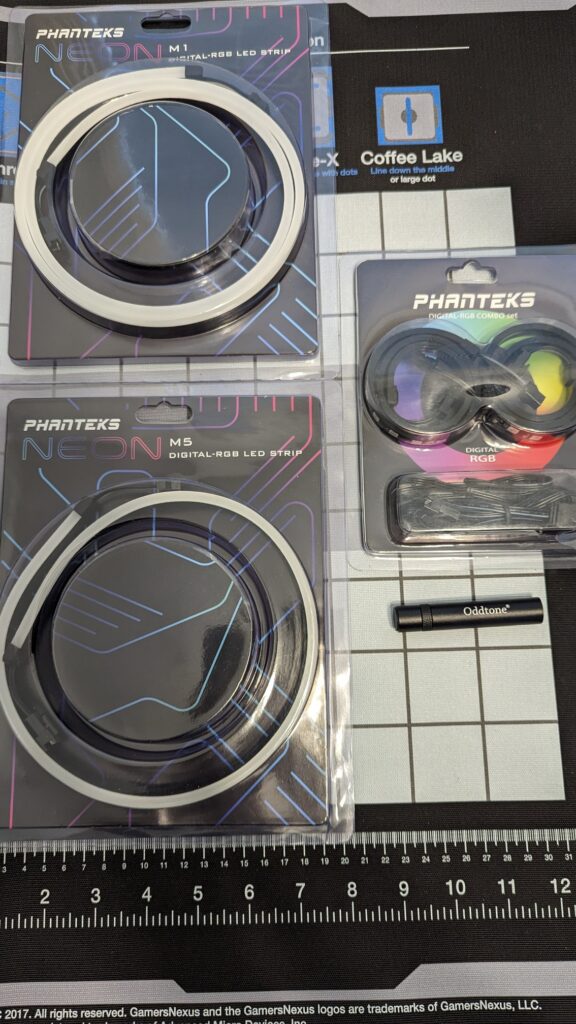
After getting the system fully up and running it for a while, I felt I needed to add a bit extra to showcase the build. The GPU had an option switch for either a blue or amethyst LED, and I decided to lean into that. I don’t normally do too much with RGB because I find it distracting, but I decided to give it a try. I picked up some Phanteks LED Strips – an M1, M5, and a combo LED Strip kit:
I did some outlines and got everything hooked into the proper RGB headers on the motherboard:
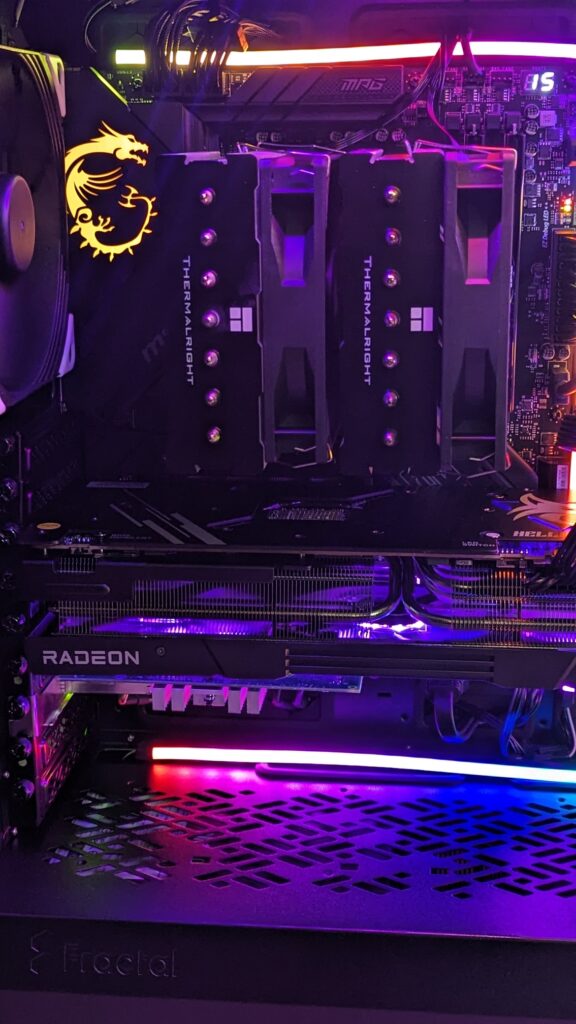
I wasn’t a huge fan of the default rainbow effect, so I used OpenRGB to configure the LEDs to do a “Breathe” profile in amethyst, as close to the GPU color as I could. I think it turned out rather well, as you can see from the top animated GIF image.
Operating System

I ended up going with Fedora Linux 39 as the OS, as I wanted a rolling release to stay more up to date with drivers and kernel updates, and wanted to give Wayland a try. I was most familiar with XFCE as a windowing environment, but it currently doesn’t support Wayland properly yet, although it is on the roadmap. I had been a pretty diehard Debian user, and most of my other desktop systems are running Linux Mint, but I was pleasantly surprised at the experience with Fedora.
I was able to get most of my games running through Steam with Proton, but I was able to get Battle.net, Epic Game Store, Ubisoft Connect, Wargaming Game Center all working through Lutris using the Glorious Eggroll Custom Wine-GE, which is a custom build of Proton. With the launchers installed, all of the games launched through them ran practically flawlessly.
Troubleshooting
Coil Whine
I did notice a significant amount of coil whine coming from the GPU with some games running, and this seems to be fairly common on the newer generation of graphics cards:
It was extremely pronounced on older FPS titles like Counter-Strike and Quake. I tried a number of fixes, but ultimately the problem was due to the game trying to process as many frames as possible and just ramping up to maximum performance. I was able to fix this by turning on V-Sync, or capping the FPS in-game to match my 144Hz monitors. Since then, I haven’t heard any coil whine.
PCI-Express Bottlenecks
Because of the GPU and multiple NVME drives, I believe I am running out of PCI-E lanes. The older Intel 82599ES 10Gbps SFP+ Network Card is only PCIe 2.0 x8. When I tried benchmarking the network performance using iperf3, I was only getting a third of the expected throughput:
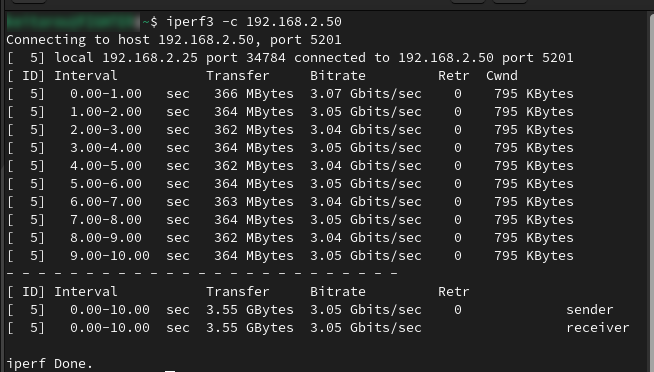
When checking my card details with lspci, I can see the card is being downgraded to 1x speed:
I tried switching around PCIe slots, and even doing PCIe bifurcation in the BIOS, but I wasn’t able to find a good solution. I put a thread up in the MSI forums, but didn’t get very far. If anyone has suggestions on how to address this please let me know.
Conclusion
I’m fairly happy with my new build, and I hope it will last me for many years. I will try to do more incremental upgrades, but for now I think it’ll be fairly solid for my use cases as a workstation.
If you have any suggestions on software or things to try out on this new PC, please let me know in the comments!
Gallery


![]()