
Introduction
Back in 2022, I wrote a couple of articles discussing the importance of backups and some hard lessons I learned when a hardware failure took down my homelab.
In Part 1 of this topic, I talked about how a failing PERC controller on one of my Dell PowerEdge servers corrupted my virtual machines and took down my homelab. The article was a reminder that:
- No matter how good the hardware you purchase is…
- No matter how much you build in redundancy…
- No matter how well you protect against disaster…
There will always be a chance, a scenario, or a point of failure, that can cause you to lose everything on your server. And so to be ready in the event that occurs, you should always make regular backups (and backups of backups, potentially offsite) of any data you consider important, or would be inconvenient to rebuild.
In Part 2, I talked about the recovery and restoring of the hypervisor (then VMware vSphere), and how I restored the virtual machines.
In this article, I will go over how my current homelab experienced a similar failure, and how the lessons I learned from the previous hardware failure helped protect me somewhat and allowed me to recover faster. Hopefully some of these lessons, tools, and practices will help you avoid similar downtime, or at least reduce the time to recovery.
Homelab Update Overview
For context, since the original articles, I’ve upgraded my homelab to where compute is handled by 3 Proxmox nodes running on Dell PowerEdge R640/R630 1U servers in a cluster with High Availability (I have a number of articles on the topic). I have Ceph as a distributed filesystem running on top of the Proxmox cluster to store the VM disks, so they can be easily migrated between nodes without downtime. For more details on my homelab, see this article.
Backup and persistent data storage is handled by a TrueNAS SCALE server running on a Dell PowerEdge R730XD. I have disks in a mirror configuration (effectively RAID 10) to reduce resilvering time if a disk does fail and needs to be replaced.
A Proxmox backup policy takes snapshots of all VMs nightly, and a full VM suspend backup is taken every Sunday night. Backups are retained for 20 days and stored on the TrueNAS server via an NFS share.
Where There’s Smoke, There’s Fire

For the last few weeks, I’ve had repeated issues with my Bitwarden virtual machine on Proxmox Node1 (pve1). The OS disk in the VM was getting corrupted, and failing to boot, requiring a rollback to a previous backup, or booting into a LiveCD environment to run fsck on the disk to fix the errors.
# To force a disk check that will find bad sectors and add to bad block inode list:
fsck -c -f -y /dev/sda1
I went into the IDRAC menu of the Dell server the R640, and I did see some warnings about the SSD write enduring reaching end of life, but I did some manual SMART checks on the disks, and I believe this is a false positive. All of the disks are enterprise grade SSDs. The disks storing the data for Ceph are at 4% used endurance (96% remaining). The OS disks are SAMSUNG MZ7LH960HAJR-00005, rated for 1366 TBW (Terrabytes Written), and from calculating, are at 35TB written so far (~2.5% wear).
# To list disks on machine:
lsblk -a

# To check disk health (on physical disk) - install smartmontools on bare metal machine:
smartctl -a /dev/sda

# To calculate TBW based on smartctl output:
sudo smartctl --attributes /dev/sda | awk '/Total_LBAs_Written/ {B=$10 * 512; printf("%d Bytes | %.2f GB | %.2f TB | %.2f TiB\n", B, B/10^9, B/10^12, B/1024^4)}'
Even when running, the VM response was VERY slow, which suggested there was a bigger problem. I had fixed it a few times, done some troubleshooting, but I was still trying to figure out what the issue was. Looking at dmesg or journalctl output inside the VM wasn’t helping. I did notice the Ceph transfer throughput was very slow, so I thought maybe the running backups were causing excessive load, reducing performance. Some of the backups were running during the day, which suggested they were taking a LONG time to finish – another warning sign.
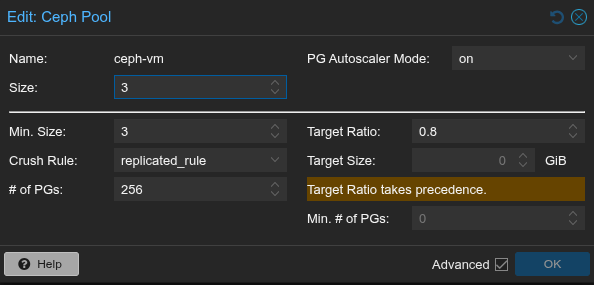
I did some tuning to increase the Ceph Placement Groups (PGs). I believe I had originally manually set them to 32 with no autoscaling. I adjusted this upwards, increased the target ratio, and enabled autoscaling, and that did seem to help, but some of the underlying issues were still present.
Return Of The Crash
A few days ago, I started to see cascading disk issues on ALL my VMs on this node. Most of them were basically frozen, would not boot past the Proxmox boot menu, threw journal disk errors, or would just boot and stay on a black screen. I tried migrating them to another node, but the problems followed. I tried restoring one of my backups from a few days before this, but the restored VMs had the same problem…

I checked the IDRAC menu and saw that there had been a RAM failure error logged:
One or more Uncorrectable Memory errors occurred in the previous boot.
Multi-bit memory errors are detected on the memory device at location(s) DIMM_A2. Immediately replace the DIMM.
The system memory has uncorrectable multi-bit memory errors in the non-execution path of a memory device at the location DIMM_A2. Immediately replace the DIMM.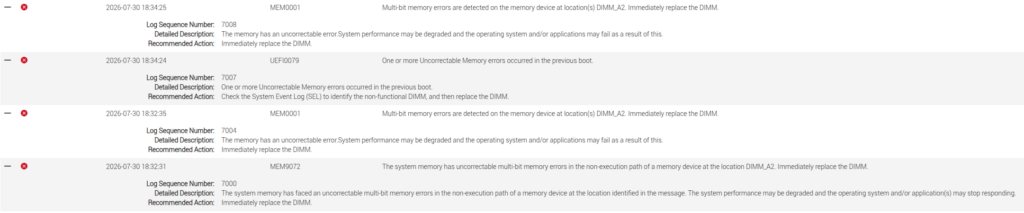
I had seen this type of error before, but it was typically a one-off, and resolved after a reboot. In the previous articles, it was the on-board disk controller that had failed, causing corruption. However at this point, I wasn’t taking any chances.

I suspected that if the VM disks running on Ceph were caching in RAM, and the data got corrupted due to the failing RAM stick, when the data was eventually written to disk, the corrupted data would be written right along with it.
The Fix Is In
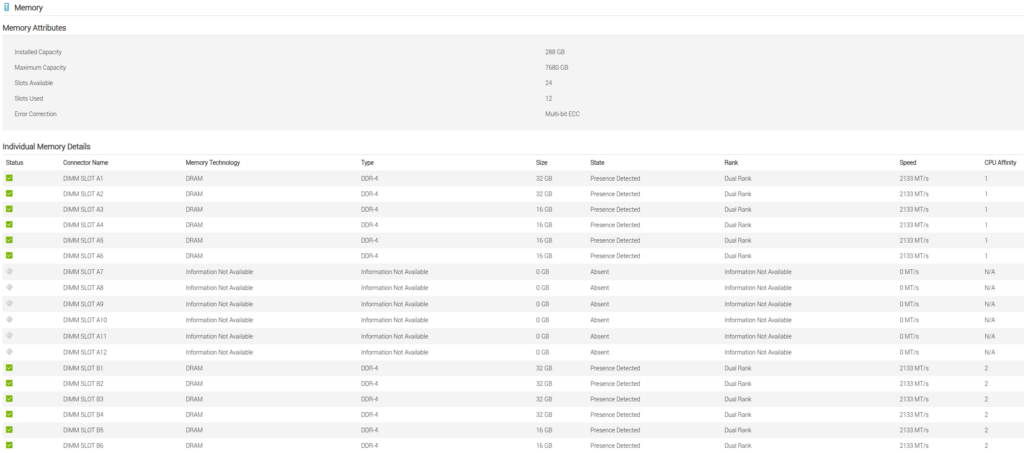
I shut down the server, pulled the RAM stick from DIMM_A2 (a Samsung 32GB DDR4 ECC 2133Mhz stick), and fortunately I had a couple of spare 16GB sticks lying around that I was able to add to replace it with. To make sure there wasn’t a hardware problem, I also ran an overnight Memtest86+ memory test on the system, to ensure there weren’t any other RAM issues.
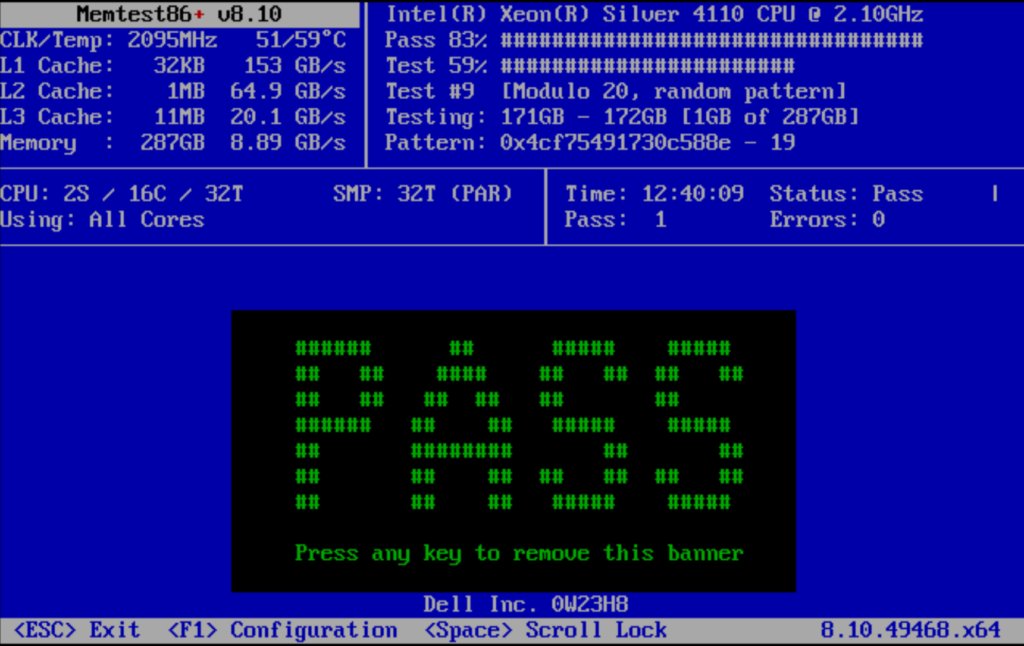
After this test came back green, I ran through some BIOS updates on all of the servers, ran a deep scrub on all of the OSD pools in case the corruption had actually affected the underlying filesystem, and did a few other diagnostics:
# To run Ceph OSD deep-scrub:
ceph osd deep-scrub <osd_id>

# Check journal  for Machine Check Exceptions:
journalctl -k | grep -i mce

# Check dmesg for EDAC (Error Detection and Correction) events:
dmesg | grep -i edac

# Watch Ceph scrub progress:
watch ceph -s
ceph pg ls scrub

# Check Ceph health:
ceph health detail
Fortunately, the deep scrub found no issues, and health was reported back HEALTH_OK.
The Usual Suspects?
Even after all of this, I still wanted to make sure it wasn’t the disk controlling failing, as that was the culprit the last time. The R640 came with a PERC H740P Mini, which shows as green, but I wanted to run some tests. Fortunately, Dell provides a utility that can be used for diagnostics – perccli.
Unfortunately, the only download link for Linux I could find was a tar.gz file which had an RPM. Fortunately, there is a way to convert the RPM to a DEB file using the alien utility.
I downloaded the file, used SCP to transfer it to the Proxmox node, then extracted it. I installed alien using apt, then ran the command to convert it to deb, then ran the command to check for errors:
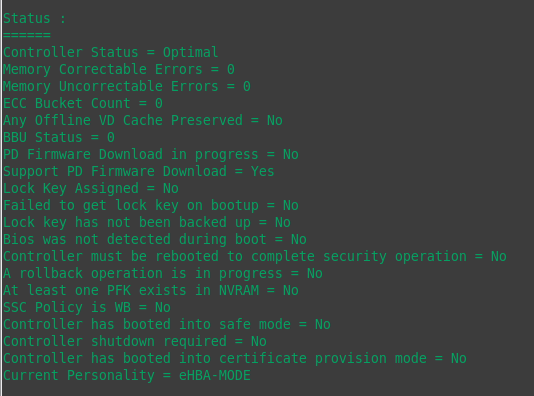
# Convert RPM to DEB using alien:
alien --to-deb ./perccli-007.2110.0000.0000-1.noarch.rpm

# Run PERCCLI64:
cd /opt/MegaRAID/perccli
./perccli64 /c0 show all
Everything seems to return without error, so I’m optimistic the hardware issues are resolved for now.
Putting The Pieces Back Together

After hopefully resolving all the issues, I restored some of the VMs from backups taken weeks ago. At this time, I was retaining 20 days worth of backups, but I’ve increased it to 30 to be safe. I still ran through a fsck of the VM disks using an Ubuntu LiveCD, just in case. I also took the opportunity to delete some old test VMs, and do some updates. Some of them needed to be upgraded from older versions of Debian or Ubuntu. Once I was confident the data corruption was resolved, I also updated Proxmox to 9.2.6, refreshed all packages, and upgraded Ceph to 20.2.2 (Tentacle) using this guide.
In the case of my UniFi Network Controller, UniFi has replaced the old install (I was using a community based Docker container) with a full install OS called UniFi OS Server. I built an updated Debian Trixie template using my packer-image-builds repo, and then cloned it to install the software on. I exported my network configuration from the old instance, and imported into UniFi OS Server, and everything came up seamlessly.
Conclusion
While I was able to recover all of the failed VMs within a day and had working backups stored on a separate server, it’s still amazing to think that all the hardware, clustering, self-healing filesystems, and complex software can’t always protect you. Corrupted data can make its way downstream, so having multiple layers of protection will at least reduce the impact.
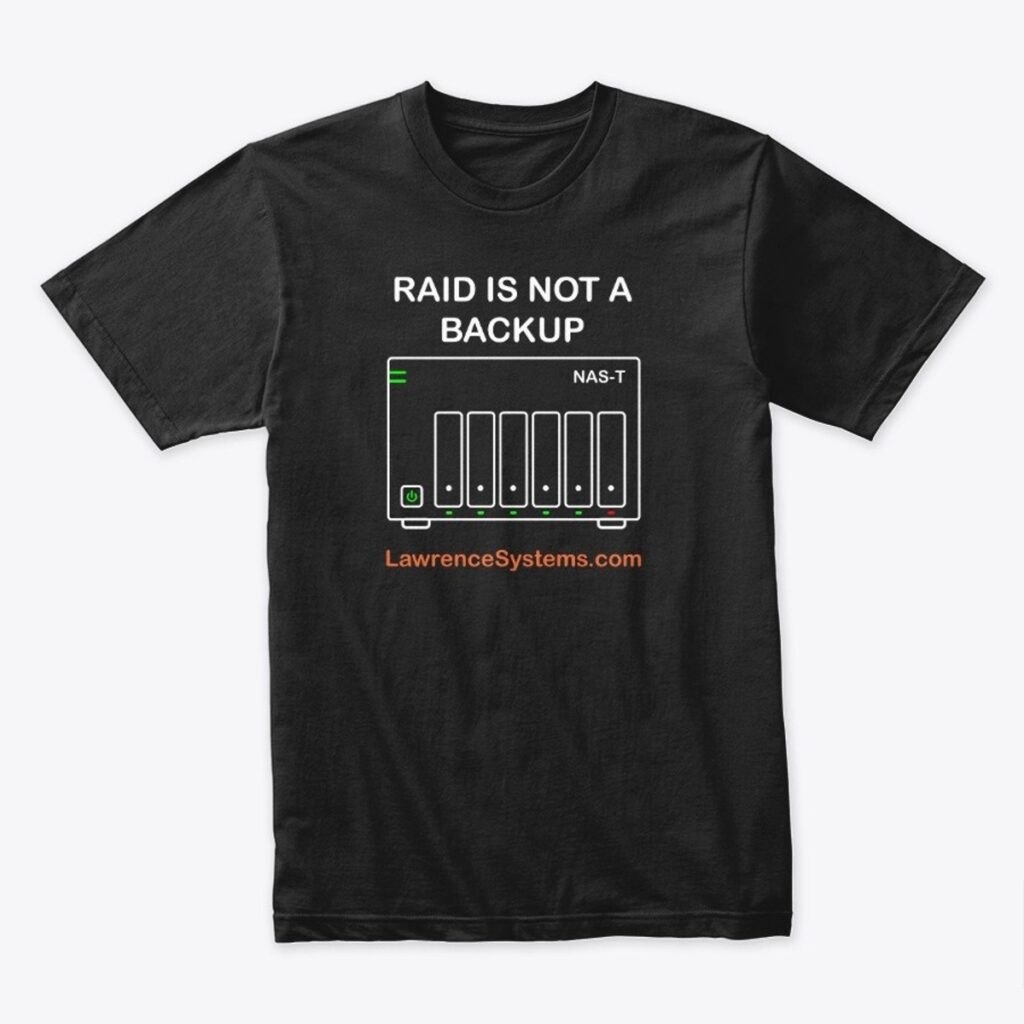
For me, having more off-site data backups to a cloud provider is something to work on, in case my TrueNAS server suffers a catastrophic failure. I definitely need to get one of these T-Shirts from Lawrence Systems.
I’m still in the process of building Infrastructure-as-Code definitions with automated installs for some of these VMs, so they can be completely rebuilt using Terraform. Rather than restoring backups for some of them, I just destroyed the old VMs and created new ones using Terraform stored in my code respositories.
On top of VM snapshots and backups, I also have some data layer backups and exports which run and store on the NAS, but I need to do a better job of automating these. I also want to set up a dedicated machine for Proxmox Backup Server, but I’ll need to get additional hardware for this.
The other thing I still need to do is add more observability and alerts to my homelab. Using Uptime Kuma to have a dashboard to show uptime and quickly identify issues, Zabbix or Prometheus and Grafana for metrics, and alerting through email or text relay.
A lot of the other applications, I’ve been holding off to migrate some of them to running on Kubernetes. I originally wanted to build the cluster on top of Proxmox from scratch, but may end up going with Talos Linux for the actual workloads, while I practice in separate VMs. Good thing I enjoy messing around with all of these different technologies.
Life is a journey, so enjoy the ride.
References
- PERCCLI – PowerEdge Expandable RAID Controller Command-Line Interface Utility
- PERCCLI – Linux – Direct Download Link
- Debian – Upgrading from Debian 12 (bookworm) to 13 (trixie)
- Proxmox Upgrade- Ceph Squid to Tentacle
