I’ve been running the Minecraft 1.17 Caves & Cliffs server for about a month now, and we typically have 5-10 active players on per night. Everyone is pretty busy in-game, and it has been great to see so many new players interacting and being creative together.
I needed to do some maintenance on the on-premise server rack this weekend to add an additional Dell PowerEdge R630 (more on that in a separate article), and an Eaton 5PX 48V Extended Battery Module. The additional compute node is being added in preparation to set up VMware Tanzu, and the additional battery is to increase the amount of time the systems can stay up during a power outage.
We recently had a power outage, and the servers were only able to stay up for 22 minutes on battery before needing to shut down. I will be doing more work to ensure everything can gracefully shut down in the event of an extended outage, but I wanted to ensure I had enough battery capacity to keep everything running while shutdown occurred.
The timing of this upgrade wasn’t the best, as the players had been planning on doing a final boss run to kill the Ender Dragon this weekend. I took this as an opportunity to look at ways to temporarily migrate the Minecraft server workload up to Google Cloud so the outage would be minimal.
Because the Minecraft server is running as a VM on vSphere, I considered using Google Cloud VMware Engine as a way to “lift and shift” the VM to GCP. While this would have probably worked, I would have needed to provision an entire VMware SDDC to run one VM, which would probably have been very expensive.
Instead, I looked for a method to export the VM from vSphere, import it into GCP as a native VM, and ensured the World files were copied over, so the users would not lose any progress.
Create a Content Library
In vCenter, go to vSphere Client > Content Libraries, and create a new library. This is to store a copy of the Minecraft Server VM as an OVF Template. I simply called mine “VM Templates”.
Export the VM as a Template
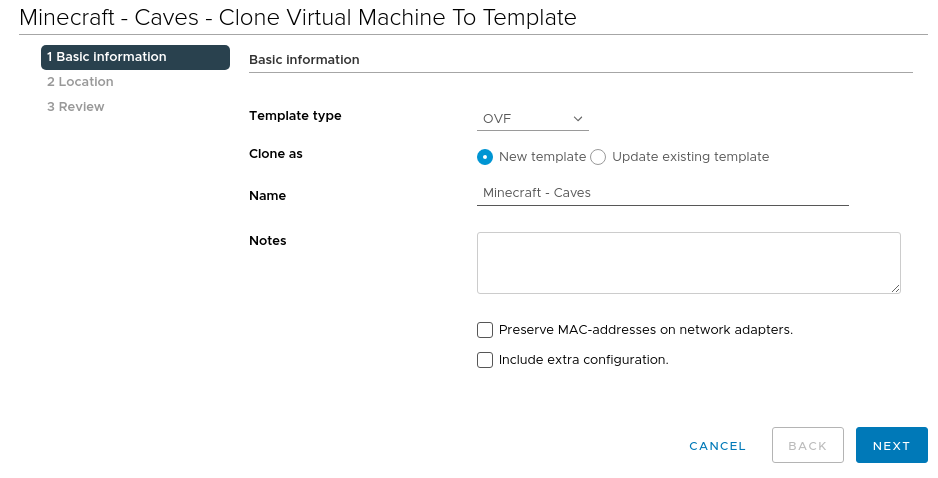
- In vCenter, go to vSphere Client > Hosts and Clusters, find the VM, right click and choose Clone > Clone as Template to Library.
- Set the Template Type to OVF.
- Clone as: New Template.
- Change the name if needed, and add notes.
- Click Next.
- For “Location”, select the Content Library created in the first step. In my case this is “VM Templates”.
- Click Next, review the action, and click Finish.
Export template files and upload to Google Cloud
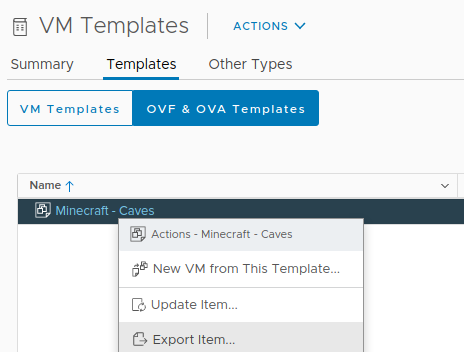
- In vCenter, go to vSphere Client > Content Libraries > VM Templates, and select the “OVF & OVA Templates” tab.
- Right click the VM Template, and select “Export Item”. This will download all of the files to your local desktop. You may need to enable popups for the vCenter website for all of the files to download properly.
- Once the files are downloaded, you will need to upload them into Google Cloud. But where to put them? In our case, we created a Google Cloud Storage Bucket to hold all of the extra files for the server, including the VM Template files.
- In Google Cloud Console, go to Navigation > Storage > Cloud Storage > Browser and select “Create Bucket”.
- Give the bucket a name. In our case we named it “minecraft-caves” to match the VM instance. Choose a region for the bucket that will be the one used for hosting the VM once created. In our case, we used us-central1 (Iowa).
- Use Standard storage class, as the files will be used for short term access, and for world backups.
- Uniform Access Control is fine, so select this, and click “Create”.
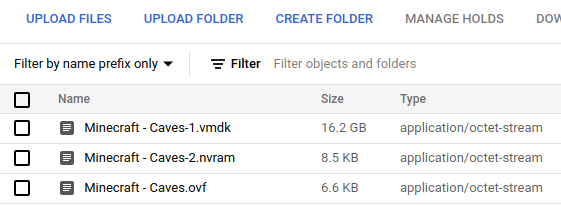
- Once the bucket is created, click on it, and click “Upload Files”. From the browser, you can now upload the files for the VM. In our case, we had 3 files:
Import the VM Template as a Machine Image
Once the files are uploaded to the Google Cloud Storage Bucket, to create a VM in Google Cloud from these files, we first need to import them as a Machine Image. For more details, see the documentation here. The easiest way to import the files is in Cloud Shell.
- Activate Cloud Shell, and ensure you are switched to the correct project. Use the command “gcloud config set project PROJECT_ID” to switch to the correct project. You should see the project name in (yellow brackets).
- Run the following command to import the machine image. Customize the flags as needed:
gcloud beta compute machine-images import minecraft-caves \
--source-uri="gs://minecraft-caves/Minecraft - Caves.ovf" \
--os=debian-10 \
--custom-cpu=4 \
--custom-memory=16GB \
--zone=us-central1-f \
--project=project-name
- There will be a few prompts to confirm regarding IAM permissions required for the operation, and you should see progress similar to the following:
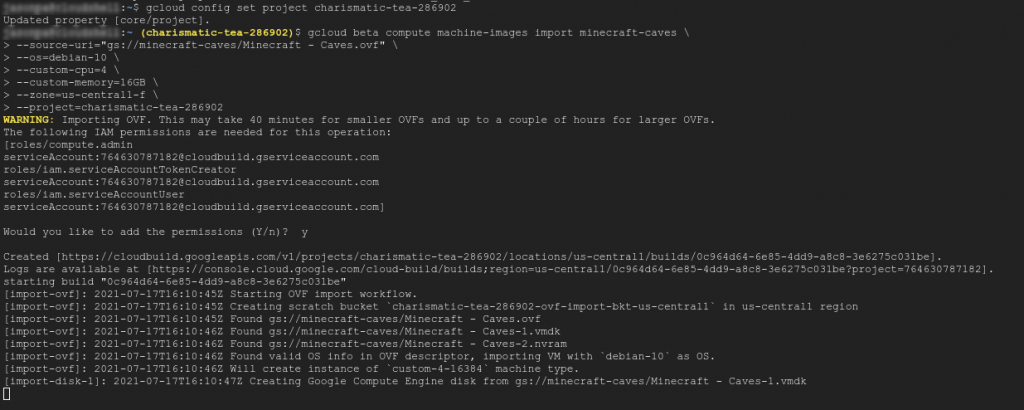
- This may take 40+ minutes to run, and your Cloud Shell will likely time out after it completes, but it should import as a machine image. You may see a temporary VM created to be used as a scratch bucket, but it will be deleted once the import is complete.
- Once this process completes, you can confirm the import was successful by going to Navigation Menu > Compute Engine > Machine Images, and confirming there is a “minecraft-caves” image available.
Create new GCP VM based on the Machine Image
Now that the Machine Image has been created, you can create a new VM instance from machine image. To do this:
- Go to Navigation Menu > Compute Engine > VM Instances > Create Instance.
- Select “New VM instance from machine image”. Choose the minecraft-caves instance. Click “Continue”
- Adjust the configuration as needed. In my case, I temporarily changed the CPUs to a Compute Optimized c2-standard-4 configuration, since I was expecting a lot of players on the server tonight. I also made sure I had an external IP reserved for the server, and that the firewall would allow traffic on the port the server is running at.
- Click “Create” and wait for the VM to be generated.
Customize the VM for Minecraft on GCP
In my case, I needed to make some small adjustments to the server to run properly on GCP.
- Did a final backup of the World files on the on-premise server and restored it on the GCP server.
- Adjusted the world backup script to use the Google Cloud Storage Bucket. I needed to give access to the service account the VM was running at.
- Tip – if you adjust permissions and you still can’t write to the bucket using gsutil cp, delete the ~/gsutil folder to remove any cached permissions.
- Disabled the mounted backup drive in /etc/fstab.
- Disabled the additional cronjob that deleted older copies of the world backup.
- Adjusted the DNS for the Minecraft server to point to the GCP VM instead of the on-premise server. In my case this was done via Cloudflare.
![]()