
Introduction
As a final step for configuring Proxmox in my homelab, I set up high availability in my Proxmox cluster. This article will go over the steps for configuring this through the Proxmox UI.
As a primer, I would recommend reviewing the following previous articles:
- Migrating Virtual Machines from VMware to Proxmox – This article goes over the steps for installing Proxmox, as well as some of the network configuration.
- Setting up a Proxmox Cluster – In depth explanation of the various networks created for preparing a Proxmox cluster, as well as preparation for highly available storage with Ceph.
- Ceph Clustering with Proxmox – Details on the shared highly available storage used for virtual machines with Ceph.
What is a High Availability Cluster?
Wikipedia describes high-availability clusters (also known as HA clusters, fail-over clusters) as:
…groups of computers that support server applications that can be reliably utilized with a minimum amount of down-time. They operate by using high availability software to harness redundant computers in groups or clusters that provide continued service when system components fail. Without clustering, if a server running a particular application crashes, the application will be unavailable until the crashed server is fixed. HA clustering remedies this situation by detecting hardware/software faults, and immediately restarting the application on another system without requiring administrative intervention, a process known as failover.
The Proxmox documentation includes more details on high-availability. Proxmox uses an ha-manager to automate failover of services (virtual machines and containers) to other nodes in the cluster, if a node becomes unavailable. It can also handle user requests to start, stop, relocate, and migrate a service.
Requirements
To use high-availability in Proxmox, you must have the following:
- at least three cluster nodes (to get reliable quorum)
- shared storage for VMs and containers
- hardware redundancy (everywhere)
- use reliable “server” components
- hardware watchdog – if not available we fall back to the linux kernel software watchdog (softdog)
- optional hardware fencing devices
Although this HA cluster is being set up in a homelab, we are able to check the boxes on these requirements:
- We have three Proxmox nodes in the cluster.
- We have Ceph set up on all three nodes for highly available shared storage.
- We also have common network storage available on TrueNAS SCALE using NFS.
- We have reasonable hardware redundancy, as we have an Eaton 5PX 1440VA UPS with a 5PX EBM (Extended Battery Module), redundant power supplies on each server, 256GB of ECC RAM on each server, mirrored OS drives using ZFS, etc.
- For reliable “server” components, we are using new and used enterprise grade equipment.
One thing we do not have is redundant network hardware. There are no backup network lines or network interfaces in this homelab, however the majority of the traffic is contained within one rack, and a failure of homelab services would not be critical.
Setting up High Availability Groups
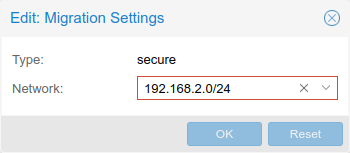
We already have all three Proxmox servers set up in a cluster, with a separate network 172.16.15.0/24 for the Corosync cluster traffic to pass over, on dedicated 1G interfaces. We also have the migration network specified to use the 10Gbps VM network to move VM data over, in the event we need to migrate a virtual machine between hosts. This is specified under Datacenter > Options > Migration Settings:
As a first step for setting up high-availability, needed to create an HA Group. This can be set under Datacenter > HA > Groups > Create. In our case, we named the group “ProxmoxHA”, and added all three nodes:
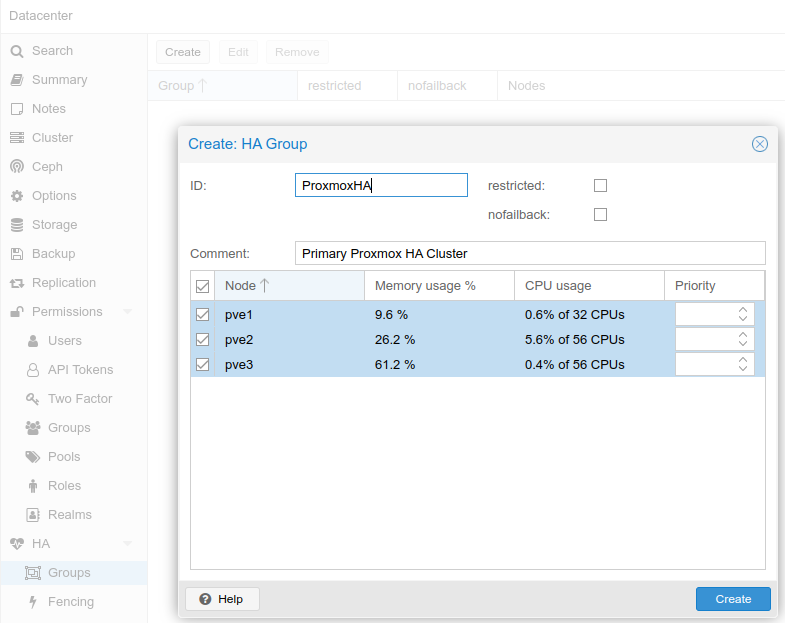
In our case, we left the priority as default, however the documentation on the ha-manager explains how this can be configured if needed.
Assigning Services to the HA Group
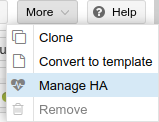
Now that the HA Group has been created, we can add VMs to the group, so that in the event of a server failure, the VM or container will be automatically started on another node. To test, I used the CephTest (VM ID 107) virtual machine I had previously set up. In the top right corner of the Proxmox UI, I clicked More > Manage HA, and brought up the HA properties for this VM:
I set the Group to the HA Group that I had created:

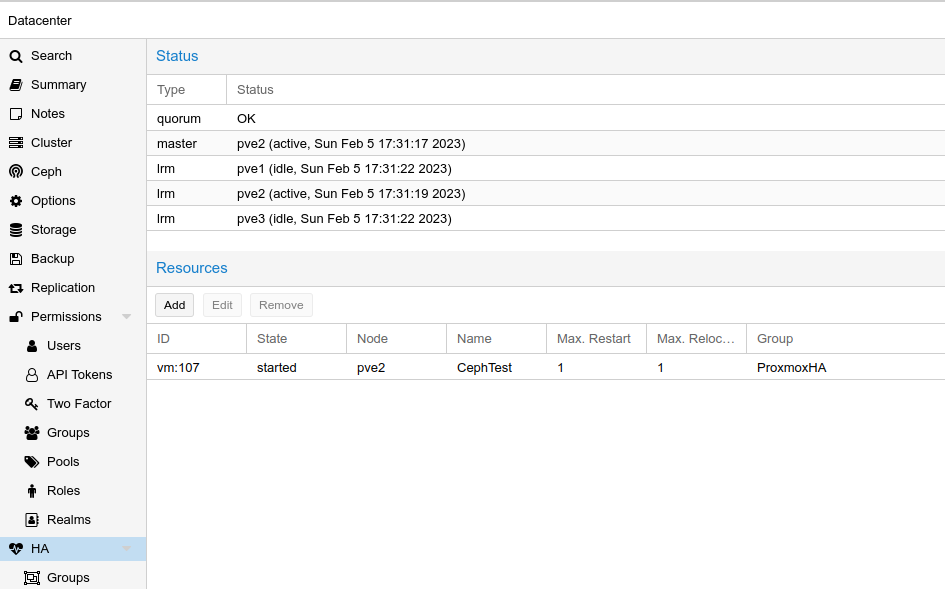
Once this was set, going to Datacenter > HA, I can see that this VM is now being managed as part of the HA Group:
Testing Failover
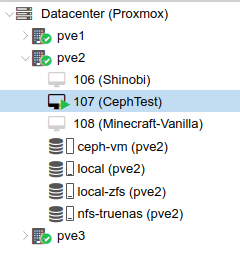
The CephTest VM was running on the pve2 node. To avoid confusion, I shut down the other VMs that were running:
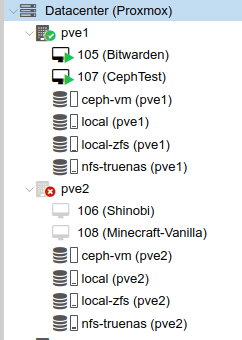
To test HA failover, I shut down the pve2 server. Once it was marked as unavailable, I could see that the CephTest VM was automatically started on pve1:
Troubleshooting – VM Freeze
From testing, we found that VMs migrated (even manually) from pve1 to either pve2 or pve3 tended to freeze, requiring a reboot to start running properly after migration. We suspected this was due to a different CPU instruction set on the servers as pve1 is a Dell R640 server with Xeon Silver 4110 family CPUs; where pve2 and pve3 are Dell R630 servers with Xeon E5 family CPUs.
There were a number of threads on the Proxmox Forums which suggested a kernel update from 5.15 to 5.19 or 6.1 might help. By running this command, we could confirm we were running an older kernel:
root@pve1:~# uname -a
Linux pve1 5.15.83-1-pve #1 SMP PVE 5.15.83-1 (2022-12-15T00:00Z) x86_64 GNU/Linux
Based on this forum thread, as of December 22, kernel 6.1 replaces the 5.19 opt-in kernel. I ran the following command on all three servers to update the kernel, and rebooted each of them:
apt update
apt install pve-kernel-6.1
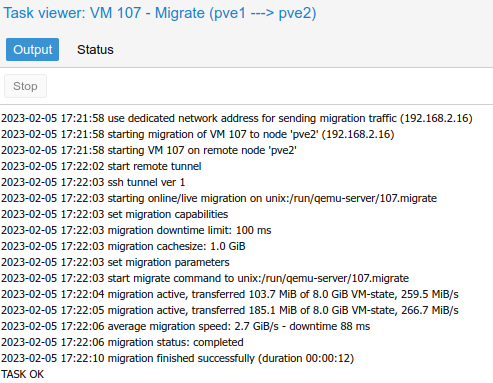
rebootAfter rebooting all three Proxmox servers, I tested a live migration from pve1 to pve2, and the VM stayed online and functional through the migration:
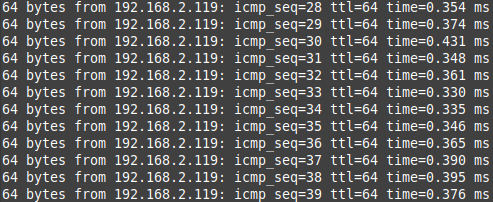
By running a ping test during the live migration, there wasn’t even an interruption:
Next Steps
Now that Ceph has been running properly for a few weeks, and VM backups are being saved on the TrueNAS SCALE server automatically, the next step is to migrate all of the VM OS disks from local ZFS storage to Ceph. This will make it much faster to migrate between nodes, as the storage is shared on all three servers. This can be easily done by going to a VM > Hardware > Hard Disk, and going to Disk Action > Move Disk > Move Storage, and selecting the Ceph cluster RBD pool. By default, the original disk will be left unattached but still available, so the “Delete Source” option can be selected to remove the original OS disk data.
Other tasks will involve setting up all VMs to start automatically, creating a new VM for testing Portainer for controlling additional Docker containers, and customizing and updating the existing VMs that were brought over from VMware.
Resources
- Wikipedia – High-availability cluster
- 45Drives YouTube – Tuesday Tech Tip – Highly Available Virtualization with Proxmox and Ceph
- Learn Linux TV YouTube – Class 16 – High Availability
- Proxmox Documentation – High Availability
- Proxmox Documentation – ha-manager
![]()
Thanks! Please write something on Proxmox Firewall and Proxmox Backup Server in your future posts.
Thanks for the suggestions! I’ll keep those in mind for future articles.